Monday 29 October 2012

Belly Patch Done


I got the belly patch glued last night using Resintite. The patch was held in place with masking tape to stop it slipping and then bound with rubber strapping.
To stop the glue filling the hole of the small knot I stuffed a bit of twisted paper towel into it.
By the way, it took 3 tries to get the patch the right shape and grain alignment, first bit was too small, second bit was perfect until I realised I got the grain edge on... damn.
It was a relief to see it looked good this morning. A quick clean up with my big bastard file revealed the result. The small hole cleaned out easily by running a drill up though it and then cleaning it out with a file.
If you compare the result with the pencil lines I drew on the stave you will see I didn't take off as much wood as I had been contemplating, this is mainly because a thinner patch is slightly flexible and will conform to the shape of the cut out, and also the knot was very clean and solid inside.

It looks slightly odd with the line of the patch cutting through the knot, but there wasn't really any other way to do it, short of slicing off half the width of the bow which would have been a bit drastic and would have spoilt the back.
There comes a point where you think, if I'm going to cut away every discontinuity or imperfection I might as well laminate a stave.
The patch hopefully will do the job of bulking up the heart wood in that area and preventing any movement around the knot whilst retaining some of the knot which shows the character and keeping the integrity of the back.
I may be able to reduce the sapwood a little during tillering rather than removing heartwood as I don't want to end up back at square one with almost all sapwood and the knot showing on the belly.

You can see I decided to patch first and then plug the small knot, this was more about impatience than aesthetics or mechanics, but I do think it adds to the integrity of the piece. (Hmmm sounding a bit like an art critic there. "The rigid lines of the patch juxtaposed with the roundness of the knot symbolising man's struggle against nature" ;) )
I'll peg the small hole today, but I won't flex it on the tiller until it's had a few days for the glue to really cure.

I should add that the remaining black area in the knot will be excavated and filled later.

Sunday 28 October 2012

A Tale of Two Yew Longbows


I don't often work on two at once, but these two are both interesting in entirely different ways.
As well as the 50# at 31" I am making a 50# at 26" for a chap who has a shorter draw as he anchors target style (under the chin) because he wears glasses and a side of the face would send the glasses off with the arrow. He's much shorter than the guy with the 31" draw.

The stave I'm hoping will make the shorter bow has bags of character, but one knot which is a bit too big to leave wood around it on the belly.
The sapwood also dips alarmingly there, I'm not quite sure how to play it, as from the other side of the limb it looks perfectly normal. the 3 pics show the same area from belly and each side.
I'm toying with letting in a sliver of heart wood along that edge of the bow cut to match from one of the off-cuts from the same log. This would also add some extra heart wood thickness on that edge.

I've actually put it up on the tiller and it only just flexing, so I need to take off a fair amount of wood yet.

Still as I said to someone a while back who wasn't sure how to get started marking out his stave "You can't do too much harm with a pencil".
I may patch the belly whilst hoping that most of the patch will disappear as the bow is worked down. Or I may just work it down and see how the knot behaves, as I can always patch it later... hmm time for a cup of tea.

You can see both staves have had the sapwood reduced to a fairly even thickness and are beginning to look like bows.

I've made the decision to patch the belly and I think I've got it right, there was a crack round the core of the knot and another smaller knot which I'd thought insignificant opened out considerably, you can see my file stuck through it in the pic where I've cleaned it out.

The second pic shows my first try at cutting out a piece of wood to fit.

You can see some of the knot will still be there in the centre of the bow where there is little stress and in the top pic how the sapwood has been slightly reduced to be replaced with heartwood. The smaller knot may be pegged after the patch is done so it will visually and mechanically unite the patch and the parent wood, or I might peg it before doing the patch. I'll have a look tonight and maybe get it done so the glue can be going off overnight.

Thursday 25 October 2012

A Good Day


A chap came over this morning to collect the MkII Maple, he brought me over a handsome Ash log as a present which I split once he'd left. I gave him on of my seasoned bits of Hazel to have a go with.
We tried out all my bows and I could see him slowly getting his eye in as he hadn't shot for ages.
One of us shot from outside the garage door whilst the other was inside safely tucked out the way behind some racking.
Now some folk would throw up their hands in horror crying 'health and safety' but we only had 3 arrows in use so we both knew what was going on. The standing area was perfectly safe and out of the line of shot, my backstop net was also there to avoid any misses or rebounds.
Anyhow the point of all this is that you get a totally different perspective on the flight and power of an arrow when it flies about 4' past you at over 100mph. You can't really see it but you hear it's hissing flight through the air and the smack as it thuds into the target.
We gave the Chinese repeater and the primitive crossbow a go too, great fun.

After the visit I got back to work on the glued up billets for the long draw bow, I marked it out using a sting line for the centre line, then  ~30mm wide at the grip running parallel for about a foot either side of the grip, then tapering to 20mm. Then roughed I it out square on the bandsaw to width, and finally reduced the sapwood to remove the darker stuff and the excess.
As I carefully sawed off the excess width it revealed a knot buried in the wood, fortunately there is still a bit of sapwood over it, and it may well disappear off the side of the bow as it is reduced in size. It's near the tip anyway which isn't a highly stressed area. I may fill it with a peg before proceeding to help avoid splitting the wood there.
Other than that it's looking good, the two billets match up to give a hint of reflex and the odd coloured sapwood is less evident now the excess has been removed.
The next task is to go over the back with drawknife and spokeshave getting the sapwood to an even thickness and a consistent growth ring where practical. Then the serious work begins getting it to an even thickness taper ready for the tiller.

Monday 22 October 2012

Splicing Yew Billets


I'm back to my Yew, I've got an exciting commission from a tall chap who wants a Yew longbow with a 31" draw at about 45# to 50# .
That will be great as it will give me a chance to shoot "in the bow" at a full medieval type draw with a manageable weight.
I'm also splicing up the Oregon Yew from which I've removed the bug eaten sapwood ready for a bamboo backing.

There is an interesting comparison between the ease of splicing the two.
The Oregon Yew has been more carefully prepared and is sawn more square where the sapwood has been sawn off. The other Yew has been cut from a nice half a log which I've had for ages, and being much thicker and not trimmed square was much trickier to mark out and saw accurately.
The wood has some odd features where changes back and forth from heartwood to sapwood. Being cut from the same log you'd think the heart/sap boundary would be consistent and match perfectly, but that's just not the case, as wood doesn't behave in a consistent convenient manner. (See pic bottom left)
In the picture of the log the tape measure is opened out to 36" so you can see I had plenty of length to play with.
Now the splices are cut I've trimmed both staves down to 78" which still gives me plenty of length.

The picture of the marking out of the Oregon billets shows the value of this blog in stopping me making mistakes. I thought "I'll take a pic of that", then as I looked I noticed the marking out on the left billet was wrong, it would have been a right pain if I'd just sawn it out wrong, as it would have been difficult to saw out two very thin slivers to correct it. The splices are 4" long and 30mm wide at the widest point (but I'd marked one as only 20mm wide!). The odd mix of metric and imperial is simply because I find it convenient, (imperial for long measurements, metric for small).
I'll get 'em glued up this afternoon.

On the chunky English Yew billet you can see how I've just run a string line straightening it out to give me a reference line for marking out the splice. Those billets being much thicker required a fair bit of adjustment to get the splice to mate up nicely, whereas the thinner Oregon billets went together with just a little trimming of the tip of the pointed end.

Saturday 20 October 2012

Maple 50# vs Hazel 40# Chrono' Test

I shot the hazel bark-on bow at the club today, it performed well, but I was slightly disappointed it didn't make the 180 yard mark (no wind, damp, slightly up hill) but that's being a bit silly as the 50# Maple bow only just made it.
Time for a shoot off through the chrono, but first I reduced the tip width on the hazel to make the string sit better and loose some mass. It still weighs in at about 43# but I can always scrape off a pound or two if necessary.
Chrono results.
Hazel approx average 150 fps.  maximum registered 154
Maple approx average 163fps maximum registered 168.4

Both very respectable and roughly in line with the 100fps plus draw weight rule of thumb.
The pleasing thing is that the Hazel easily beat my old 40# Hazel (136).
I tried both 70gn and 100gn points but it didn't seem to make any noticeable difference. Both bows handle the 100gn points well and that extra bit of weight helps make 'em less flirty when there's some breeze or they hit a leaf or two.
I've added an antler arrow pass to the bark on bow now and finished sanding it, it seems to have settled to about the 40# now.
Because of the linseed oil and beeswax polish on the back I can't use Danish oil (it won't take over wax). I shall put a tiny patch of varnish on the belly so that I can sign it without the ink bleeding into the wood, then I'll varnish over that (trying not to smear it) then give it plenty of beeswax polish.
I should have some pics of it finished tomorrow if it stop raining.
That will be may last primitive of the year, I've some longbows to make a start on by splicing some billets next.

Friday 19 October 2012

Antler Nocks + Update


I've done antler tip overlays on the Hazel bark-on bow, they blend in nicely with the bark as long as they aren't cleaned up too white!
The top overlay (left) is a lopsided sliver reflecting the natural twist in the limb rather than trying to fight it.

I found an old Dacron bowstring which gives a rather low brace (4 1/2") but it allows me to shoot it in a bit before final tweaking. I think flatbows can shift a bit as they are shot in so I've left a bit of spare draw weight to play with.
It's 45# at 28" on the low brace. I need my bracer to shoot it as it's a bit of a wrist slapper at that low brace, but it's allowed me to adjust the grip to suit how the bow draws. It's shooting hard and true and I'll be making a proper string so that I can shoot it at the club tomorrow (weather permitting).

The antler is much harder than Waterbuffalo horn, and I've stuck on the thin overlays using high viscosity cyanoacrylate (superglue) for a change. I'd been discussing the merits of various glues with my brother who is moving away from epoxy for some things (he restores shotguns, and some stock repairs require the use of glues).
As I'd had one overlay come adrift on my 'Twister'* bow which had been epoxied I thought I'd try the cyanoacrylate. The pic bottom right shows how the limb tip is rasped back at an angle so the overlay isn't simply flat on the top of the limb, but slightly angled into it.

Update:- I've made a string and shot 50 arrows, it feels very good, still a hint of wrist slap as the brace height is still only 5 1/4".
 I'll twist the string a bit and slowly bring it up to somewhere nearer 6" once it's shot in a bit more.
I've shaped the grip a little more and it's shooting very nicely, the grip has the pith line from the centre of the log showing up it's middle, which I like as it shows the origins of the bow.

* I reglued the overlay on Twister and added a silver pin though it into the wood.
http://bowyersdiary.blogspot.co.uk/2012/07/equipment-malfunctions.html

Monday 15 October 2012

Bark On Hazel Video + Update + Explain More

The bark on Hazel is making good progress, and has moved on since the video which shows it coming back to about 22".
The outer 1/3 - 1/2 of the left (lower limb) is a bit stiff and the right limb is also a tad stiff at the outer 1/2, but you can see it's fairly even and flexing nicely.
I've lightly run a wire brush over the bark along the length of the bow in the hope that it will help the Linseed oil and beeswax polish soak in.
Hopefully by tonight it will be somewhere close to full draw and I can get a few shots from it.
Update:- Up to 40# at about 25" now, shot a few arrows through it, looking good. The nice feature knot has broken through, it's not very big, but a nice talking point, with features like this you can tease the target archers by telling 'em it's a peep sight for shooting down hill.  :)

Explain More!
Maybe that phrase 'broken through' needs explaining as it sounds rather alarming. I've been removing wood slowly from the belly using rasp, file and scraper to make the outer limbs flex more and get me towards full draw at 40#.
The belly side of that knot/groove feature originally looked like a dark pin prick. As I removed wood from the belly it gradually became larger until it showed as a black oval about the size of the sharpened lead tip of a pencil. I felt it with the point of a needle file and it was soft, so I carefully excavated it and found it opened out to the other side. I' cleaned it out and threaded some string through which I could work back and forth to clean and polish it.
I hope that was what was required. I think 'tease target archers' speaks for itself ;)

Sunday 14 October 2012

Maple Finished & Hazel Bark On Bow


The Maple has had about 150 arrows through it now, the arrow plate is done and I shot it at the club, I wasn't shooting as well as I'd hoped, the 100 odd arrows at 10 paces had left me rather zoned in on that range.
The bow was fine it just took me a while to settle into field shooting.
Distance wise it got past the 180 yards uphill into a breeze, I only shot 3, and one was within a pace of the clout peg!
A couple of the club guys shot it and felt it shot flat and sweet, Tom (our irritatingly good shot, who can't miss even with a bow he's never seen before) took a pic of me at full draw. I'm really happy with the tiller, it always looks a tad different when it's actually being shot (you can see the twist in the upper limb, which makes it appear fat).
I took some pics showing the string alignment despite the apparent asymmetry of the bow (note the plumb bob hanging to the right to give a reference).
The bark on Hazel I'd been working on is coming along nicely now. I gave the bark a good slather of beeswax polish and some linseed oil in the hope that it will keep it supple, it buffed up like burnished copper, but is rather camouflaged if you put it down!
The pics of the Hazel show the overall shape (sort of 'paddle bow' shape) and some of the twist and features.
It's back to about 20" at 40# (target weight/draw is 40# at 28") it's at a low brace height and I'm working on getting a nice even tiller despite the twists and knots.
I have high hopes for it as it's a reasonable length for a 40# bow and has plenty of width. The style of nocks and such detail hasn't been decided yet, but that can wait until its back to 28" (fingers crossed, not counting chickens and assorted exhortations to the deities of bow making)

Friday 12 October 2012

Maple II vs Maple I (update Full Draw Pic)


The mkII Maple is now shooting, there is a marked difference in the feel, with the mk1 I had to fiddle and fettle to get a good arrow flight, narrowing the grip down substantially at the arrow pass. MkII just shoots where you point, in fact it's even better than that!
It was grouping so well I had to shoot around my target to avoid smashing arrows, I worked around the edge starting from a 12o'clock position, as I got to the last arrow I thought 'I suppose I could shoot this one at the white squ....' thud the arrow had already hit home plumb centre of the white foam square!
MkII is at the top in both pics, upper pic is top limb belly side, second pic is viewing the back, you can see the mkII has a much chunkier grip.
The bow has bags of character, unstrung it looks to have a slight sideways curve to it and a line from nock to nock seems to run off centre through the arrow pass making it almost centreshot.
You can see in the top pic looking at the upper bow the very top edge looks much straighter than the lower edge. Oddly the mkI looks to be the opposite having it's lower edge straighter, maybe it's because they are from opposite sides of the tree, or maybe I just can't saw straight.
 It's not that simple though, as such a bow would want to twist in the had, but this doesn't. There is a twist in each stave  making one limb twisted relative to the other, and when braced it all sits square with a slight bias towards the arrow pass, it draws square and shoots true. You can also see how I managed to squeeze an extra half inch of length for the mkII (not quite sure how I did it!)
How do I know it's not all skew whiff?
I inadvertently shot it flipped lower limb uppermost, it shot just as sweet!


These bows are laid out straight in theory with perfect even straight limbs and an even taper, but in reality you have to follow the bends and twists of the wood to some extent, and that's the beauty of 'em.
Now I don't want to get over excited as it's not fully shot in or finished yet, but it's had about 65 arrows through it and it's looking good. The pics let you see the slightly different limb shape between the two bows, the £2 coin marks where the chrysals are in the mk1 and you can see the limb has been left wider in that area on the mkII. There is a slight colour difference on the back too, with the mkII the bark seemed to pop off leaving a more even slightly darker surface, some of which is the cambium, this has been lightly sanded, but I don't see any value in going down further and spoiling a nice even surface.
My son had a go and appreciated the workout pulling 50#. He's not quite to full draw as the lft arm is a bit bent, understandable as he couldn't be bothered with the bracer, and there are slight balance issues in the chair. It's now had over a 100 arrows through it and has settled down to a slight set, at brace the lower limb looks slightly weak, but this is due to it having some natural deflex while the upper has a hint of reflex. (there is a hint of distortion in the pic as the bow is canted with the top limb towards the camera)
I've tweaked the tiller a tiny bit since the shot above and it's just about arc of a circle. I'm almost tempted to re-heat treat the lower limb to let it relax back from it's slight set and toughen it up a tad in the inner third, I think it's a silly idea though as you have to know when to quit. The scale reads about 48#, but it's been at full draw for a few seconds and will have relaxed slightly.

I walked up to town through the woodland, heard a woodpecker and there was a good bit of fungi about. I noticed a tall skinny Ash tree which had buckled and bent over, it had a decent straight section about 6' tall below the break, so that might be a candidate for tidying up later, there was a bit of Hazel and one of Maple cut/broke too which might do for stick bows.
A guy may be coming over for a visit at the weekend, if so we can collect the staves and he might want some of the spoils.
I'll post a shot of each on the tiller later so you can see the different shape at full draw, and I'll have to shoot mkII through the chrono'.


Thursday 11 October 2012

Applying to Cut Yew and General Progress

I though this tale of Yew hunting might be useful, so here goes (I've avoided specific names and locations).
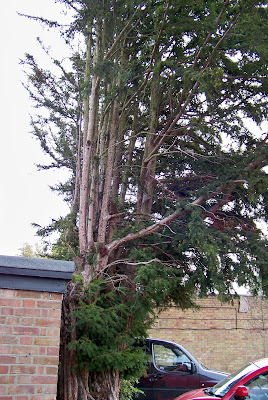
The Yew was spotted at the back of a commercial premises and had been heavily cut when some earlier building work was done (very badly and probably without permission... What a waste of Yew, as it probably went for firewood!). The limb I was interested in had been partially sawn through at the base when the previous work was done, so I felt it was appropriate to harvest it.
 I went round the front to the shops and explained that I wanted to cut one branch and asked who owned it. They directed me to a shop across the road where the proprietor was the owner of several properties.
The man was very helpful and said he was happy for me to cut a limb, but I would need permission from the local council.
The council website had a general enquiry E-mail address, so I E-mailed explaining who I was, what I wanted to cut, the location and my experience with local conservation groups, the forestry commission etc. I was also at pains to point out that I only use hand saws (not a chainsaw). I got an automated response saying it would be passed to the appropriate department and I should hear within 5 days.
The next day I got a helpful response from the parks department saying they had no objections, but they had to pass it onto the planning department in case it had a tree preservation order (TPO) on it.
It transpires it doesn't have a TPO but it is in a conservation area so permission and approval is required.
The E-mailed response had the appropriate form attached, which they required in triplicate including a location, description of the work, details of ownership, illustrations etc.
I returned to the Yew and took pictures to send off with the application, and now I'm waiting on their judgement.
Whilst taking the pictures I got chatting to a lady from one of the shops who was concerned that I was 'a madman wanting to cut down her Yew tree' and that I couldn't touch it without permission of the council .
I explained that that's why I was taking the pictures and exactly what I wanted to do. I showed her her pictures of my work on my camera . I pointed out the limb I wanted and how it was nearly sawn through and generally sweet talked her.
By the end she was happy that I wasn't a chainsaw wielding vandal, being a balding 60year old does have some advantages. I expect the above exercise undertaken when I was an adolescent would have produced different results.
I mustn't count my chickens before they are hatched, but I'm fairly hopeful... my son mischievously suggested that photoshopping chainsaw cuts onto photos of any wood I wanted to harvest might be a cunning plan!
It's a fair bit of work for what will probably only yield one bow, but you don't get ow't for now't, I've also learned the process and made some good contacts.
Hopefully this may provide some useful tips for any of you in the UK hoping to cut some Yew.
Update ( 25/4/2014):- Permission came through several weeks later and I cut the Yew, it became a 130# warbow about a year or so later.

Meanwhile the MkII Maple has been making great progress, I worked it back to about 24" at 45#  and got the tiller how I wanted it before taking it up to 50#. During this I noticed that the rule on my tiller rig hadn't been adjusted and was under reading! Thus the previous bow had probably been drawn to about 3/4" over, when you consider I'd taken it to an indicated 29" which was nearer 29 3/4" this possibly explains some of the problem.
The bow still isn't finished or shot in yet, but it's looking good and I'm optimistic.

Monday 8 October 2012

Speeding Up Again! Sorting my Staves

Shaken off most of this cold at last and my energy level has shot back up.
I've worked the Maple back some more and it's beginning to get close about 20" at 45# from a low brace.
My stash of staves has been taken down for a review, my Yew was a bit disappointing at first glance, but I ran a string line down some of them and trimmed them on the bandsaw, I'm a bit more optimistic now.
One stave belongs to a guy at the club, he cut it during some landscape gardening and it's fairly small diameter with not much heart wood. It had the bad side sawn off the log back in January so now I trimmed down the edges, barely touching the heartwood. It looks to have a bow in there and has the virtue of some spare length.  I only have about 3 sound longbow staves, one with a huge wiggle in it (going front to back rather than sideways, which is ok). I had a good half log about 50" long which I'd been toying with for ages, that's now been run lengthways through the bandsaw to give a pair of 1/4 log matched billets. I have one other skinny top off a log which I've also sawn to give two 1/2 log billets.
So that's only about 5 longbows.
There is one other full length piece which is wide but thin which has the makings of a really good Yew primitive. The wide bit and two of the staves were from the Yew I cut last year, there's a pic of me leaning on it while it is still growing, here.
http://bowyersdiary.blogspot.co.uk/2011/04/yew-staves-in-tree.html
This blog entry show when it was harvested.
http://bowyersdiary.blogspot.co.uk/2011/11/yew-log.html
Notice the several months between the posts, it's a slow job getting Yew! When I'd first run that log through the bandsaw for seasoning I was worried I'd ruined it, but after all this time, I've stopped panicking and it's fine.

Looking at my Hazel was again a tad disappointing but one piece jumped out at me shouting 'make me into a bow!' Just as well, as a guy has just contacted me asking after a 'bark on' Hazel primitive. I can't keep my hands off the Hazel and it's already roughed out, there are a couple of nice features and one small knot which shows on the back as a deep groove, when cleaned out this might end up as a much sought after feature... a hole through the limb! On the other hand it may get filled or left alone.
The 'bark on' is a bit of a lottery, I'll rub it over and wax it, but how long it stays on will be down to the spirits of the woods. The great thing about leaving the bark is it offers some protection from damage and the tools of the well meaning bowyer.
My big worry is I've got no Yew seasoning for 2014, now that seems a long way off at the moment, but I need to cut some over the Winter.
I've not had much luck getting permission to cut Yew this year, but I have my eye on 3 or 4 potential pieces.
Last week I had a contact from a guy asking if I sell Yew staves. I gave him the short answer 'no' but went on to offer some advice on where to find it. Basically the advice is, make it your business to get to know every Yew tree in a 2 mile radius of where you live. If you inspect 'em all, you should find a stave or two, it takes a while to get your eye in and even when you do find some there's the issue of getting permission.
Anyhow, I spotted a Yew which had been heavily trimmed in order to make room for an extension at the back of a commercial premises (I'm not even sure the poor tree will survive much longer). I shall go and have another look and see if they'll let me trim a limb for some small pecuniary remuneration.

Friday 5 October 2012

Slowing Down

I'm taking it really slowly on the Maple, I've got the tail end of a cold which is dragging on and making me take it easy (cough cough...).
It's also making me think and realise how we learn and re-learn.
We get better at something and speed up, get cocky and complacent and then have to get back to the tried and tested, no short cuts method.
Pride comes before a fall when making bows. Of course there are plenty of ways of cutting corners, but it can easily be the wrong one!
I've teased the bow back to about 40-45# on a 3" brace height and it's looking pretty even, very little set, no heat treatment, just painstaking work in little 15 minute burst over the last few evenings.
I'm in danger of taking so much care over the knotty upper limb that I'll neglect the lower.
I'm pretty sure the previous version had taken more set by this point as I'd adopted a strategy of...
'Go at it until it starts to set whilst exercising it to maximum draw weight, then heat treat it' .
This time it's tease it back as far as I can first at a more circumspect draw weight.

Here's a question, the nice knobbly feature on the back of the bow shows as an ordinary very sound knot on the belly. Is a knot on the belly stronger in compression than it's surrounding wood, weaker or the same?

This needs answering as, if I leave extra wood around it and it's stiffer anyway I'll have a stiff point on the limb and consequently weak points either side. If I assume it's stronger and I thin it too much maybe it will chrysal or over stress the back?

Maybe I'm being hard on myself and that first bow was getting to know the limitations of the wood, the main thing is I'm still pressing on...maybe this one will fail too, maybe I'm just asking too much of the wood and it needs to be even longer and wider (hmmm 6' long 6" wide, also can be used as a snow board, maybe there's a new product idea there, must talk to the marketing department).

I've done the heat treatment this afternoon. While it's settling down I'll start sorting through my stash of timber.
I've looked through the Hazel and started roughing out the best stave for a primitive. I'll have a shufti at the Yew once I've got the last insuation board out of the garage and screwed to the ceiling.

Monday 1 October 2012

Not Going to Rush

Nah, not going to get the heat treating done today, but I'm getting in pulling back slowly. I'm not exceeding 45# whereas last time I probably pulled it to 55# at times.
I'm trying to ease it back to brace height with a nice even tiller and no set before I heat treat, which I only want to do once.
I've got a taut string on it which helps me adjust the string line.
The thickness is slowly coming down and I'm relying much more on my eyes and fingers to tell me if I have any thin areas.
I think I've been getting sucked into too much analysis and measurement with all this talk of elliptical tiller rather than using my eye and gut!
It's fine to think about all this stuff but it boils down to a lump of wood flexing in an even manner, not really a job for a load of maths. Maths is just a tool and like any tool, there's a right time and way to use it.
I'll keep pottering along a little and often and maybe get it heat treated tomorrow night.

Why a little and often?
Well I look at one edge of the bow and think it looks a bit thicker this edge than t'other, then I put it on the shave horse and look again... now it looks like the other edge may be the thicker. Time to stop and do this and have a cuppa.
Too easy to get drawn into overthink. When in doubt .