Monday 28 December 2020

Review of the Year

 Hmm, well despite the obvious Covid problems I hope we’ve all managed to hang on and find a bit of shooting over the year. Hopefully 2021 will be somewhat better, but probably not until late spring or summer being realistic.

 I know that during lockdown some people have been doing more to make their own kit whether it be making strings, arrows, leather work or having a go at making a bow. Learning new skills is a good way to keep mind and brain active and combat the stress, so if you haven’t tried yet, have a go at making a bow or, even just a simple stick and string kid’s bow.
For my part I’ve taken up the blues harmonica and got back into playing on-line bridge.

I think I only did two field shoots over the year and some roving.

 My bow making has been slow and steady, having made about 10 bows. Highlights have been some interesting repair work, cutting some Walnut which will be ready to use in late January, and a few bamboo backed bows, boo/Yew/Lemonwood. A couple of Boo/Yew, an 80# Yew primitive and an Ash backed Yew heavyish flight bow (~80#) that I haven’t really tested.

The Horn bow (horn/wood /sinew Turkish, Ottoman style bow) which I bought as a part finished project was probably the most interesting. The work I’ve done to correct its sideways bend/twist, which became evident after the first session of shooting, has been very successful, although I’ve yet to shoot it since that work.
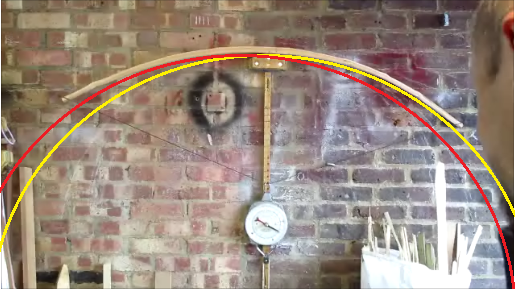
I also had a quick play with a skinny off-cut of yew to make a small “H bow” flight bow. The wood was knotty and it only survives a couple of shots. It did however allow me to try an extended grip which meant I could use my normal anchor point whilst drawing a 17” draw bow. I may build another version from clean wood if I get some suitable off cuts.
I've tried to post more video on Youtube (Del Cat is the channel name)
Someone posted a Youtube link to a Lego Archer Automaton which is very good, it’s based on an experimental one I made some years back. The Lego one is much more presentable but uses my basic design/mechanism. I was gratified to see that the guy who made it acknowledged my design.
A search on Youtube should find it, as it’s worth a look.

It's funny how some little things stick in my mind from the year... seeing a newt in the garden pond was particularly satisfying as it's the first we've seen. (When we moved here about 25 years ago the pond was dried up and needed a re building with a decent rubber liner).

It's gone cold today, too cold to go into the garage, but I'll probably dig out the heater and get out there to finish off a scruffy billeted Yew bow I've been working on, then start on the Walnut or Elm.
Anyhow, lets hope that by the time the weather warms up again in the spring, the covid situation is calming down.

All the best to one and all.


Sunday 6 December 2020

Santa's Workshop

 In the run up to Christmas... allow me to digress...
(Note:_ no disrespect to anyone's personal beliefs here, we are all welcomed to our own)
Well, personally I see it as the Winter Solstice, as there is no evidence to suggest that Jesus was actually born at this time of year, and all that stuff about a Roman census telling everyone to go back to their birth places is just flim flam to sort of tie in to the whole birth of Christ story... The Romans had good records, they had census(es?), but didn't demand going back to your birth place, it would create chaos...no room at the Inn? Yes 'cos it's shut and the innkeeper has gone back to his birthplace! 

Meanwhile back at the plot, the bow making has rather waned, it will pick up in the new year when I'll have that heartless Walnut to play with. I have been busy tho' making a wooden toy for the grand-daughters who will be 1 year and a couple of days old at Christmas.
The toy is a simple wooden truck with a car that fits onto the back (not quite finished yet), this was inspired by something similar I saw posted on Facebook, and there are loads of images if you do a search for wooden toys.

One problem was sourcing the end caps for the axles, but I found them on Ebay, the problem is often knowing what to call things... these were sold as "Capped Starlock Washers" and were available in all sizes. I went for a 4mm axle on the car and 5mm on the truck. I chose mild steel for the axles, could have used Stainless but I find mild is easier to work and it shouldn't rust as it's an indoor toy (hmmm, mind... baby sucking is probably fairly corrosive!). All my newer power tools came in handy, the wheels were a tad sticky on the axle as they'd been wiped with Danish oil, but touching the car down onto the belt sander, like a rolling road got 'em spinning nicely and was fun too!
It's all made of Ash (an off-cut from a big slab that I made a desk top with years ago. The wheels were turned on my little lathe and I used the mini-mill for the drilling.
I've since added a couple of little side cheeks to the bed of the truck to locate the car on the back... don't want it flying off when corning at speed :-)

Sunday 15 November 2020

Horn Bow and Character Yew

 It's been a few weeks since I did some fairly severe correction to the horn bow which include heating it whilst clamped up and re-doing some of the sinew. I plucked up courage and strung it agian, it's looking much better but is still slightly biased to one side. Drawing it until I could feel it lift off the lever and letting it down showed it to be much improved, I'll possibly do a smaller but similar correction to the other limb, but I'll shoot it again first to see if it settles. However not much shooting at the moment due to Covid of course. I didn't bother with pics or video as there's no much to show.

In the mean time I worked a Austrian Yew stave from a friend, it was an odd piece with a big waggle at one end where a big branch forked out, it turned out to be rather short at about 69" and ended up tillered to 80# at 28" I expect it would draw further, but the stave was worrisome with some drying cracks, discolouration between hear and sapwood, and of course the character waggles.
I didn't actually do all the finishing on the bow as the guy I made if for was keen to do the finishing, to keep him occupied during lockdown. He's also getting into making strings, which is great for me as I find that a bit of a chore. I did finish one nock and the character waggle just o see what it would look like.
There are loads of videos on my Youtube channel which char the path from log to bow.
Here's the first showing it as a log being reduced to see if I can work round the knot.
https://www.youtube.com/watch?v=iat-ReAU-TU 

Here's the last vid showing it virtually finished, although, I did rasp a little more from the stiff areas:-
https://www.youtube.com/watch?v=LYajjV8VrZQ&t=1s

Friday 30 October 2020

H Bow


I was tidying the garage/workshop when I came across a skinny strip ofYew cut off the corner of a big quarter stave of Austrian Yew. I thought I might make a quick miniature...but why not two fixed side by side like a letter H ?
Long story short, I did it, the big decision was to heat bend the limbs so that they met at the tips with about 1" gap at the centre. The advantage being that it allows a single string.
I contrived a cunning extended grip arrangement so that I could draw the 17" draw ( the bow is 34.5" ntn) and still anchor at my normal place. This might be quite a punchy little flight bow, I was aiming for about 40# at 17".
Some tentative shots were promising and I posted some video on my Youtube channel (Del Cat)... I'd been posting the progress all along.
What would it do through the chrono... ?
First short draw shot 140fps.
Fuller draw 160fps...
Third shot... BANG


It exploded, one of the lower limbs blowing out between two small knots... really need clean wood for a flight bow.
I did a video autopsy too.

Wednesday 14 October 2020

A bit more on the Horn Bow

 I've been rather busy making a cot for my win granddaughters, they are getting a bit big for sharing the first one I built. I had a quick look at the horn bow, and the last correction I did to help remove the sideways bend/twist seemed to be a partial success. The string was still pulling over a bit, but not as bad, however that limb was now looking weak as some of the sinew was lifting. I did some more correction with hot water and dry heat from the hot air gun with bow clamped up, this seems to have worked, but I also need to add more sinew to that limb, which I'll probably do with it clamped up in position to help prevent the sinew pulling any bend or twist back, or the heat of the glue and sinew causing the correction to relax out.
The sinew work will require considerable time to dry out (months) so I'll get back to some other bow making once that's done.
I did a video to show the progress.
https://www.youtube.com/watch?v=453CvcK99o8

Sunday 20 September 2020

Splicing, Warbow, Horn bow

 Someone asked me if I'd done a video on splicing billets. i was surprised to find that I hadn't so I made one... well a series of 4 actually! (on my Del Cat Youtube channel).
I also noticed one of my mates on Facebook wanting to sell a bow to fund a new warbow...errrr, I think I've got a stave that is his that I said I'd make into a bow for him (he'd given me a primo Pacific yew stave as payment). I messaged him pronto and promised to jump straight on it... work currently in progress.
A couple of videos of that on the Youtube channel too. It's really nice that he wasn't hassling me for the bow, that way, when I remembered it, I was full of enthusiasm rather than feeling I aught to do it. That's why I only really make 'em for friends these days or do bows that really pique my interest.
Currently at 130# @ 29", so pretty close!

I've been adding a bit more sinew to the horn bow too, to correct the sideways bend on the weaker limb. That has had getting on for 2 weeks to dry out, so I'll hopefully be posting something about that next week.

 I'm doing less on here and more on the Youtube channel these days, although for some projects you still can't beat the written word and decent still images.
I've noticed the viewing figures have dropped off to, not that I'm fussed, I mostly do it as my aide memoire.
Stay safe... the second wave of covid is on it's way.


Thursday 3 September 2020

Arrow Refurb' Day


I broke a few arrows trying to master the thumb ring, I'd also lost some points off my "pretend medieval" ones so I spent a bit of time refurbishing them. I spliced new ends onto the broken ones using the Titebond III that I'd bought a while back, it seems more convenient than the slow epoxy. I fitted new points on them all, the points for the pretend medievals were machined by one of the guys from our club, I'd made him a new bow in short time a few weeks back and he did the points for me as a bonus... blimey they are sharp! I gave 'em a quick touch with a warding file for fear that they'd puncture the bottom of my quiver, they will dull down pretty quick once they hit the mud at 130mph a few times.
They are 3/8" maple shafts (some now have a bit of Ash V spliced onto the end, as I can't find Maple shafts any more) the fletchings are 5" shield cut, points 100gn. This gives a nice compromise between looking good and yet flying a decent distance.
There was a guy on one of the archery websites last week complaining that his new 58# bow only shot as far as his 50# ... the more I question him, the less it made sense as he said they would shoot "about 100 yards" Yet he claimed to have a 30" draw. None of it added up, then he said he had 7" fletchings and the penny dropped..., I'd met someone like him before... totally resistant to any sensible advice and wanting to shoot 1/4 pound arrows from a low weight bow because the arrows make a nice noise. 
To be fair to him, he did thank me for my advice, I must remember not to answer his posts in future.
Why do people ask questions when they have no interest in the answer and no intention of following any advice? 

The other arrows are just my standard 28" 5/16", 100gn point, 3" fletchings .
I also ordered some 11/32" pine shafts (60-65 spine) for heavier bows. Out of interest, and slightly counter-intuitively a 28" arrow made up with 11/32" shaft 100gn, and 3" fletchings will shoot substantially further than the 3/8" pretend medievals at 31" . This illustrates why matey with his 58# bow couldn't get any distance.
BTW. I've noticed that pine shafts don't seem to cut as cleanly as cedar with a taper tool (for the points), it's no great worry, just an observation.

Sunday 30 August 2020

Shooting the Horn Bow


I took the horn bow roving, having strung it before I set off. I got someone to video me shooting it, but when I got home ... no camera... I'd swear I'd lobbed it into the car, but its nowhere to be seen. I daresay, as soon as I buy a new one, it will miraculously turn up!
Some of the guys were still at the club and when contacted said they couldn't see it anywhere, mind they did find one of my lost arrows which helps a tad.
The bow performed quite well, it was me that was the limiting factor, and I wish I had the video to see how far I was drawing. As I warmed up and the bow settled in, I reckon I was shooting about 250 yards and probably drawing about 25".
The bow was showing that one weak limb as still rather weak with bit of a tendency for the string to move over to one side. I was mostly shooting Mediterranean loose, but did shoot 3 or 4 with the thumb ring, which went quite well.

Now I'm home, I've got the weak limb strapped into a hint of extra reflex and I've added some more sinew to the weak area and to the weaker side. I'll leave it for a few weeks before reappraising it.

I'm more irritated about the memory card than the camera... I s'pose I'll buy the same model, as I know it does the job and I have a spare battery for it (Canon IXUS) at least it's not a stupidly expensive one.

Ha! The camera has turned up... it had slithered down the back of the rear seat squabs, Jackie got her slim lady hands down there and fished it out. I'll post some pics later!


Monday 24 August 2020

Horn Bow Braced


I've got the horn bow braced and made a string from B55 which is horrid stretchy stuff, but necessary for horn bows with the high brace force to avoid breaking the nocks. Karpowicz tried lots of different ways to reinforce the nocks but they all failed with fastflite strings (or the strings broke). He actually specifies B50, but B55 is B50 with a thinner strand apparently. Anyhow to be sure I made a B55 string for one of my flight bows and, yes it stretched like mad, so it is
definitely not fastflite. 
The bow seems pretty well made with one limb being just a whisker weaker and a slight hint of twist at one tip. These minor issues can probably be corrected with pressure.
I haven't managed a decent draw, but I pulled it close to the point where the string lifts away from the levers, so hopefully, I should be able to manage it. The high initial draw weight feels rather brutal though.
here's a link to the video:- 

https://www.youtube.com/watch?v=cjv8rfdCSTE

Tuesday 18 August 2020

Horn Bow, Warbow, 3D Shoot


I've had the horn bow to a low brace using a peg board to get the limbs back, but before getting it fully braced I've done some sinew work on the it, filing the edges to tidy up some loose sinew or sinew that was wrapped around onto the horn belly. I've added more sinew where it looked a bit thin or dry, this needs plenty of time to dry thoroughly, although the hide glue actually gels and becomes touch dry pretty quickly.
While I've been waiting for this to cure I've been doing some work on a warbow belonging to my mate JT, he's not had it very long and never been happy with it. "..sold to me as a 130#....had less than 100 arrows through it. Just a horrible square (in the hand), uncomfortable thing to shoot! " I had an initial appraisal on the tiller and then set to work, it was a bit long at about 82" nock to nock with rather cumbersome nocks so I sawed them off, loosing about an inch off each end. I thought it might be interesting to saw a long section through the nocks to see how they were fitted... the result was horrible.
The pic shows one of mine (from a 50-60# bow) for comparison.

The Warbow has been strapped down straight and heat treated ready for some re-tillering.
I've done videos of both the horn bow and the warbow refurb on my youtube channel. (Del Cat)

The weather has gone from heatwave to persistent rain an thunder, luckily it held off for my first 3D shoot since the Covid lockdown at the Cloth of Gold club. It was an interesting format "kills only"

which gave a score of 10 for a kill, but minus 2 for a wound! Two arrows on each target, it produces some anomalous results like a small pheasant where I was the the only one from our group of 3 to hit it, but I scored -2. It was good fun and I was with my primitive, the other guys had a longbow and a recurve barebow. It was interesting to compare styles on some of the trickier stances. I was much more at ease with the kneeling shots.
Thanks to all at CoG for a wonderful shoot.
The torrential rain returned on my way home and more the next day, when in the evening I noticed some water on the floor of the sun lounge... so it was up onto the flat roof clearing all the gutters and accumulated buck from the roof, hopefully that will prevent a recurrence. I couldn't see any actual problem and my guess is that the muck accumulated behind and under my solar hot water pipework had allowed water to rise over the flashing or to find a seam in the flashing/upstand against the wall. Time will tell.

Saturday 8 August 2020

Horn Bow!

 Back in February (it seemed further back than that) I bought a box of stuff from a bowyer who was moving on to other interest and projects. The main items were a part finished composite "horn bow"* , a pair of horns, some horn tips, sinew and Adam Karpowicz book "Ottoman and Turkish Bows manufacture and design" (the definitive work on the subject, and very hard to find in hard copy).
The bow comprises the horn, wood and sinew structure, but it had never been strung so I approached it with some trepidation...which is maybe why it's been sitting since February! Mind I had been studying the book.


I've now started work tentatively flexing it, tidying up the sinew and evaluating it. I may do some glue and sinew work before cutting in nocks and stringing it, but it's a matter of making haste slowly. I have done some sinew work before, but very little, I do know it needs weeks if not months or years to fully cure (depending on thickness of glue, sinew etc. Hopefully the little I'll be doing will cure in a month or two.


There is no rush, and I recognise I'm a long way from my comfort zone. It bears no real resemblance to tillering a wooden bow as apparently most of the adjustment is done by flexing and some gentle heat.

The blogger site has forced me to use the new version which abjectly refuses to allow me to move pictures or wrap around text in any useful or consistent manner... maybe it's so it works better on phones. Anyhow, it is what it is and I'm tending to post more on Youtube now. The advantage of the blogger is that it gives better quality still pics which are good for reference... the disadvantage is, it's bad for my blood pressure!
https://www.youtube.com/watch?v=8muNDAm0qUM
https://www.youtube.com/watch?v=fuJtTpaDu6M


It's something that I'd had as a long standing ambition and the sort of thing I read about as a kid with almost total incomprehension... bows that can shoot 800yards? So for me it's a privilege to get to work on the bow without having had to do some of the very slow, messy preparation and sinew work.
I'm doing short video showing the progress, but bear in mind it's a long term project with no real idea of the potential draw weight or the chance of success... but that what bow interests me... I don't make bows to end up with a bow! I make bows to learn and to enhance my skills.

*That's not to be confused with the many cheap Chinese "horse bows" on the market which are fibre glass (or glass/wood laminate) . These are often leather covered and I've seen people shooting them as "primitive" at NFAS field shoots and winning... I couldn't be bothered to challenge it, I only shoot for fun, and if people want to cheat I'd rather not get wound up by it. Experience over the years has shown me that cheats often claim total innocence, get "upset" and say things like "oh, well if you want to be like that about it"... and you end up as villain of the piece... 
I don't really want any more plastic medals anyway! 

Friday 31 July 2020

Heavy Yew primitive Pics

I've got it sanded, oiled and waxed, it looks really good, unfortunately I can't get it back to full draw myself, but hopefully it will get shot on Sunday.
It's rather handsome.


Tuesday 28 July 2020

Heavy Yew Primitive

A mate of mine brought over a shortish but wide Austrian Yew stave, to see if I could make a 85# @30" primitive. I was a tad sceptical due to it being only about 71" long, mind being a wide flat design it should be able to cope. I'm just a bit nervy after the last one blew up!
Anyway, it's back to about 80# @27" already. At one point I was considering laminating some short curved levers to add an couple of inches to each end and to give string lift at about 20" draw, however the bloke I'm doing it for didn't fancy that, so I'll save the idea for a later bow. It'll be a good use for thin Yew off-cuts.


The bow has a very weird dip/bend at one end where it was beginning to fork, it'll be an interesting feature, but it's difficult to slim down without overdoing it and risking failure. The limbs were about 2" wide almost all the way up, a bit like the Meare Heath bow with pin nocks at the ends, but I'll gradually narrow it to a more graceful willow leaf sort of shape.

I've added a V shaped insert at one end where there was a manky ring and not much heart wood, that will just stabilise it a bit when narrowed, give a whisker extra length to make room for a stringer groove and also allow me to form a clean flat surface to glue on a horn tip overlay, which is fairly substantial.

The first 3 videos of the build are on my Youtube chanel "Del Cat" (no adverts on the channel...don't you hate the ads?)

https://www.youtube.com/watch?v=HoDMj-3lvNM
https://www.youtube.com/watch?v=0dXec-d_vcI
https://www.youtube.com/watch?v=LhUXpSuNOks


Talking of Youtube, I watched one of my vids on our big flatscreen TV as it's available through Virgin media. It looked pretty good!

Tuesday 21 July 2020

Yew Stick Bow Explosion

I've been working on a Yew stick bow (from a 2" diameter pole) I was doing it pretty much free hand just trying to use it as it came. I was aiming for 70# at 28" which was maybe a tad optimistic.
It was moving nicely, beginning to get the tiller looking nice at about 24" draw, low brace and 70#.
I'd just done some tidying up and was giving it plenty of exercise on the tiller when it went bang.
There was a big knot going right through the back at the arrow pass. I'd been hoping the bow was stiff enough there, but obviously no! The back parted, if I'd rasped out a scoop and patched over with clean sapwood it would have been fine.
Anyhow, I'm not too worried as it was just a quick experiment, and fortunately I hadn't wasted the time or effort of putting horn nocks on it.
I did a couple of vids, one during tillering and an autopsy!
https://www.youtube.com/watch?v=ynQa9JxAmJo
https://www.youtube.com/watch?v=HaxxoqOy9jU

Meanwhile on the Primitive Archer forum, one of the guys in Wales was having trouble making a wooden crossbow prod, only a light weight 40# one, but they are tricky due to the short length and can easily end up too thin or too heavy and chrysalling on the belly. I said I'd see if I had any suitable off cuts, and found a nice slat of the Walnut that I cut with my brother back in January. I cleaned it up, sawed it to a thickness taper of about 1.6mm for each 6" of length and posted it off to him, there's a bit of deflex in it, but than can be a good thing IMO with a crossbow prod.
It'll be interesting to see how it performs, as it felt quite lively when I tested a small off-cut.

Friday 17 July 2020

Wonky Rides Again


Blimey! The much re-built wonky ELB showed up last week with a tiny crack across two pin knots on the back. Originally the bow was warbow length and weight, but it failed at the splice after a good deal of use, I cut it down at the break, re-spliced it and made it into a lower weight ELB, still good for roving. It's good to spot these problems early, as left alone it could have resulted in catastrophic failure... and nobody likes that!


I carefully probed and lifted the crack to see how bad it was and stared to chisel it out with my little ground down needle files. Its hard to chisel it out clean straight and even width, so I ground down a square section warding file to clean it up. A set of warding files from Toolstation are cheap and very handy.
I cut some sapwood from an off-cut of English Yew and shaped it to suit, checking against my profile gauge for a good fit, this was glued in with Cascamite, a G clamp in the centre squeezing it down nicely and then one added at each end, the clamps were cushioned on the belly side of the bow with a block of softwood and a piece of carpet.

It was left over night, cleaned up this morning and tested on the tiller to 28", it all looks good, but will get a thorough test on Sunday.


I've rather lost track of what I've done over the last week!
One of the guys at our rove asked if I could make him a 100# laminate. I wasn't very keen, but then remembered I had some relatively thin (~3/8"?) Yew heartwood billets glued up, and some Lemonwood, so I jumped to it and made a Bamboo/Yew/Lemonwood bow. The yew billets had a bit of a thin patch near the centre, so this was built up with a sliver of Pacific Yew that I had. The patch is just under the bamboo backing and it covers over the Z splice, that's quite handy as it allowed me to actually test the Yew core on the tiller, flexing it slightly. The point of that being to get the core tapered so that the Lemonwood belly can be a reasonable thickness and won't end up being feathered out to nothing at the tips.

It was all glued up on one of my formers that has a hint of reflex at the tips. To be honest I'm not so keen on that look now and probably prefer a hint of back set in the limbs which will give a
more arc of a circle tiller and not the stiff outers that the reflexed tips give. I just like the "full compass"look in a heavy bow.
Any how that bow was shot in/tested and approved last Sunday and I brought it back to complete the finishing, polishing the nocks, burning in the arrow pass and Danish oiling it.


Tuesday 7 July 2020

35# Boo/Yew Finished

I did the arrow plate with Mother of Pearl and a nice black leather grip from a bit of old motorcycle jacket which is lovely leather.

I used a new leather working knife which my son had given me for my birthday, it's really good, razor sharp and the solid grip allows a good pressure for a clean cut. The curved blade makes it easy to cut curves and also great for skiving the leather to a thin feathered edge to fold it over and glue (with UHU glue) for a neat rolled edge. The pic shows the skived edge and the thin card template I used to get the size and shape of the leather. The edges of the bamboo back felt a bit uncomfortable so I glued some thick leather to the back and pared it down to give a more rounded contour, the leather grip was then fitted over that.

PS. I've gone back to the old "classic" blogger, it wasn't perfect, but it was much better than the "new" version which wouldn't let me move pics within the text.

Thursday 2 July 2020

35# Boo Yew Virtually Finished

It just needs a leather grip, an arrow plate, another couple of coats of danish oil and some beeswax polish.
I've shot about 60 arrows through it and rounded the belly a tad more to get the draw weight down to just a whisker over 35# which will allow for some settling.
The two pics show the hint of reflex at the tips and the slim patch added to the core before the bamboo back was glued on, it was to allow for a tear out in the wood where the knotty area is. those knots and swirls look rather nice now it's sanded and had a wipe of Danish.

There was some discussion following my last Youtube video where I was measuring the draw weight. Someone had posted a video showing that brace height doesn't change draw weight, and that it's a myth. Another person disagreed and posted a counter video and asked my opinion....
Well, I thought it would change draw weight, but not by much... the first video was all done with glass faced deflex

reflex bows which have force draw curves which  are less linear than a longbow, they are also capable of substantial overdraw and have high brace height.... not my thing.

He was also only changing the brace height by a couple of inches.
Anyhow I did a test with a Hickory backed Yew bow which will take a 32" draw. I tested with the brace height at 1.5" and 6.26" pulling the bow to 26" (to avoid over stressing it)... I couldn't see any difference in draw weight.
Then I repeated the test pulling to 30" and could measure a small but definite difference.
1.5"   brace height 54# @30"
6.25" brace height 55.5# @30"

You can draw your own conclusions and do your own experiments if you like.
My personal view is that realistic changes in brace height make very little difference to draw weight.
Mind, they do change the length of the power stroke.

Sunday 28 June 2020

Boo Backed Yew Bows

I went out for a bit of roving which was most refreshing, not too hot and a pleasantly brisk wind.
I took the much repaired boo/Yew primitive to return to my mate JT who used for the rove. He felt it hadn't lost much weight and when we shot at the 240 yard mark (albeit with a stiff tail wind) he used some flight arrows and sailed about 60 yards past! So that proves the Titebond III word fine.
I shot My Ash backed Yew which is comfortable to shoot and makes a decent distance.

Meanwhile I've been making a 35# Boo Yew ELB for an old friend, it's at about the lowest weight I like to make as they are getting a bit skinny and twitchy if you go much lower. As it is I miss-read my scale and was pulling it to 45#, mind it was on a slack string, so no harm done. It's braced now and ready for the horn nocks and narrowing the tips.
I've done a couple of videos:-
https://www.youtube.com/watch?v=AKSRcSfu-9A&t=27s
https://www.youtube.com/watch?v=8L-SceJzYl4&t=173s


Thursday 18 June 2020

The Cascamite Saga

To cut a long story short, I received a replacement 1.5 kg tub from Polyvine who make it, they are a small family concern who bought the rights back in the 50' from the American company who invented it in the 30's. I'm just recalling the phone conversation I had with their guy who was very knowledgeable and helpful so the details may be slightly out.
He said that the failure was probably due to storage at elevated temperature in the distribution chain degrading the product (it's comprised of 3 components, all white powder, and the hardener/activator part can degrade)... he guessed that the hot weather we had earlier in the year could be the culprit and said it had happened once before in their history.
Anyway, while I was waiting for the the response from Polyvine I also bought a small tub of Cascamite from Axminster and some Titebond III from RDG Tools.
I re-backed the boo/Yew primitive using the TitebondIII having first cleaned up the mating surfaces on the belt sander. Of course the belt sander removed some material which means the bow is now more like 100# rather than the projected 115# from the first re-backing.
https://www.youtube.com/watch?v=KlXni0I-KI0&t=4s

The small tub from Axminster actually arrived before the stuff from Polyvine and when I mixed a test batch it seemed the same whitish colour as the bad stuff (I also mixed a test sample of that to compare). I was getting pretty frustrated by now but resolved to be patient and wait for the stuff from Polyvine.
When that arrived I mixed two identical test batches. It confirmed what I'd suspected. The good stuff is beige, the bad stuff is near white. I sent the picture to Axminster who agreed a "non return refund" as I said I didn't want the cost or inconvenience of returning the product. The next day I broke the cured test sample in half to show the how it looked, you can see it has separated into two layers, the bulk having a chalky appearance. The good stuff is homogeneous and beige.
I'd suggest anyone buying Cascamite order it direct from Polyvine.com 

Thursday 11 June 2020

Yew Flight Bow

Whilst waiting for two lots of glue to arrive, some more Cascamite (which I shall send back if it mixes up white) and some Titebond III. I looked through my staves, there's what I though was a perfect half log which had revealed a diseased ring when inspected some time back. I had a good look at that and decided it maybe had the makings of a good self Yew flight bow.
I've been working on that, got it rough tillered to about 20" on a taut string and I've been heat treating it.
It's all been videoed, 3 parts so far, probably another today.
Ah, I've found how to change the size of pictures in the new blogger... guess what Icon I have to click ! It's an image of a pencil (eh? What genius thought of that... and if I click on the icon it says change.. there is an icon to add a caption... but that is two short horizontal lines... eh? Slaps forehead in despair)
Part 1


Friday 5 June 2020

Grrrrrrrr

I'm rather annoyed I've spent a couple of days re-backing the 120# Boo/Yew primitive. Got it on the tiller and the glue line just popped!I've always used Cascamite for gluing backings and laminations and never had a problem. I started a new tub to glue for this bamboo back. It normally mixes to a beige creamy consistency... this was white, it also didn't seem to spread or wet the surface very well leaving an orange peel effect. It did seem to gel and harden correctly.... As I'm flexing the bow on the tiller I hear a "crack" and the glue line opened up on the grip... I stuck a pallet knife in the gap and waggled it around, giving it a light tap with a hammer. It just split off easily with the glue line parting leaving a chalky surface! Normally the glue line is stronger than the wood. https://www.youtube.com/watch?v=f7B960-IA1U&t=10s
I've ordered some more from Axminster as I no longer trust the previous supplier. There are other glues of course but I'm averse to unnecessary change... a month or so back I was invited (online) to have my NHS repeat prescription automatically delivered by post from the company that runs the chemist that I go to... I thought I'd have a look... once I started the process, it turned out that they couldn't do my wife's medication at the same time (saving postage etc) but they were hoping to provide this service later. I added a note saying that, in that case I wouldn't bother with the service. Of course they ignored my note and my medication arrived in plenty of time... Great... why was I annoyed you ask? Because next month it didn't arrive... despite their website saying it was "posted" (but with no date). I ended up phoning the chemist and they got everything back on track, restoring it to the old system... I take in the prescriptions in plenty of time and collect them a week later. Do you want us to text you when it's ready for collection? NO! I don't want to add another layer of unnecessary complexity, creating extra work and the potential for cock-ups thank you very much.... STOP CHANGING STUFF THAT WORKS FINE!
Calm calm... Then the fecking garlic press broke... FFS... maybe I'll machine one from solid. Whadda ya mean I'm going lockdown crazy? I'm not the only one.... I was in the garage and I heard some very loud f'ing and blinding outside as a neighbour was having a face off with a UPS driver who had bumped into his car. So I loaded up the Chinese repeating crossbow, lifted the garage door stepped out and asked "Punk, do you want to make my day?" Ok the last bit's a lie. Even Emily cat is getting stressed and over grooming again ..... it's Hitler Cat encroaching on her territory. Other than that all is quiet and peaceful here.
UPDATE:- I got a phone call from Polyvine who make Cascamite and they suggested that the glue may have spoiled due to being stored at high temperature in a distribution warehouse. It's basically made of 3 components, all being fine white powder and apparently the hardener component can deteriorate. They will send me out a new tub. In future I will buy direct from them (Polyvine.com) not a distributor. Mind I will still do a test batch when it arrives.

Sunday 31 May 2020

Some You Win, Some You Loose


Took the two repaired bows out to where we shoot near Chelmsford.
The bamboo repair failed, starting to lift with a bit of a cracking sound as my mate JT neared full draw... never mind, I'll take the back off and re-back it.

The re-repaired yew faired better, I'd left a little extra thickness on the new patch and it looked fine at full draw, it's good to keep the old work horse going.
It was very hot over there and my bow seemed to have relaxed a fair bit in the heat. I'd made up a flight arrow from one of my early ones with the front end tapered a lot more and a lighter brass point from a broken flight arrow fitted, and that flew nicely a good 30 yards or so further than the other arrows.

Wednesday 27 May 2020

Not my Best work

The repair is done, but doesn't look great. When I strung the bow there were signs of it lifting at the node end. I'll have to see if it survives being shot, it it lifts I'll take off the entire back and do a new bamboo back. Must remember to take some thickness measurements first!

Hmmm the blogger has been updated to make it less user friendly but supposedly better for viewing on a smart phone or tablet. I couldn't find the "new post" button initially (nor could anyone else!) I'm not even sure what I did to create this new post!
Ah, found it... there's a round orange circle bottom right with a + in it . Presumably some one thinks this is better than having "New Post" top left at the head of the main menu? (Sigh)
Can't seem to adjust the size of the pics either. Hey ho, pretty typical really, I expect the bugs will get ironed out..