Sunday, 2 November 2025

New Flight PB over 400 yards

 The mk2 flight bow, now draws a little over 50# and with 20" arrows I just broke the 400yard mark!
The two arrows that got past 400yards were quadrant bamboo 180 and 185 grain.
The bow probably doesn't fit neatly into any of the official classes set out by any of the archery organisations (I believe the only class for wooden bows is English Longbow), but I consider that to be their fault rather than mine.
I am simply competing against myself for my own enjoyment.

Update:- next week, it didn't shoot so far. I put it back up on the tiller and the draw weight had dropped to 45# from the 53# that it was the previous week.


https://www.youtube.com/watch?v=RcErLa_wpi0

Monday, 29 September 2025

Flight bow & Arrows Test Shots

 I only took about 5 shots, the string was coming off, probably due to oscillations after the string had hit home, as there was no limb damage.
Furthest shot was 301 yards, that was the penultimate shot. I was getting used to the flipper and could watch the arrow onto the brush rest and loose without having to consciously think about how to do it.
I was a tad disappointed, but realised I didn't actually know the draw weight at that length of draw.
When I got home I tested it and it was only 32 pounds! So 300 yards is very respectable.
None of the arrows broke and the furthest was 170 grain. The quadrant bamboo arrows flew well and the neon yellow paint showed up well. The superglued thin card fletchings seemed to work well, although one had a chunk taken out of the vane that pointed down.
I think those limbs could have drawn much further, but the string issue needs sorting.
I've cut a couple of inches off each limb and I'll mount them with less deflex. That's made the tips wider, so I have room to improve the string alignment and maybe incorporate some tip stiffness and string catchers.
All in all a good learning session.

Saturday, 13 September 2025

Wooden Flight Bow & Arrows

 I've been beavering away with the flight bow test bed, mounting boo/Yew limbs in a plywood shoot through riser (several videos on my Youtube channel ( @delcat8168) ).


I've had a test shot which was promising, but now the problem is making arrows! I'm experimenting with 4 section cane arrows made from heavy warbow cane arrows, sawing them along their length sanding the sawn faces and gluing back together, then repeating the process having rotated the shaft 90 degrees.


I'm also experimenting with compressing wood using heat and pressure like was used to produce "forgewood" shafts back in the 70's 80's.
Making arrows isn't my fave, but a flight bow isn't much good without them!
I changed the set up to use 2 5ton jacks, draped an insulated blanket over the rectangular tube sections to hold the heat in. I clipped the moveable rectangular tube up underneath the top one while I blasted hot air through them from a hot air gun while the wood was steaming. The wood was about 20mm square and 20 " long. When it was compressed it was sawn along the length to give two shafts.
i think I squeezed a bit hard as a load of resin came out despite it being very old timber.
I need to experiment with other wood.
It certainly proves it can work as a DIY process.
If anyone wants to do full length arrow shaft, I'd guess you'd want 3 jacks or two heavier duty ones.
The rectangular tube was 60x30x3mm wall thickness. The other metal was odd stuff I had lying around. 

Wednesday, 13 August 2025

Harry Drake and Flight Archery

 I bought the book, Harry Drake and Flight Archery by Kay Koppeldrayer on E-bay, it had to be shipped over from the US.
If it is your area of interest, I thoroughly recommend it.
Flight is maybe a bit niche, and my particular interest within that niche is wooden bow, wooden arrow.
The book pulls together a wealth of biography and information not easily accessible elsewhere. 
It's re-kindled my interest in flight and given areas for further work and experimentation.
The point of this post is to lay out those topics before I forget them.
I think I have a good candidate for a bow (my Osage flight bow) I also have ideas for further bow developments, some based on my previous bows. The main area that needs development is the arrows.
1. Short arrows for use with short draw bows or bows with overdraws. I need to make many more arrows.
2. Compressed wood for arrow shafts? Surface finish? velum vanes?
3. Release aid, flipper or mechanical.
5. Brush rest.
6. Yew bow heat treated belly, with very solid substantial riser approx equal length to the limbs. Shoot through design.
Maybe with takedown style limbs (Yew limb reinforced with thread binding at root to allow fixing to (adjustable?) riser. Forward mounted grip High poundage to brace.
Aim for 60-70# @ 23" using 20-21" arrows?
Refer to H bow (~ 36" long) for comparison.

Thursday, 19 June 2025

Flight Bow Experiments

 I haven't posted for ages, but the experiments with my Osage flight bow needed documenting for my own sanity.
The bow was originally somewhere between 70-80# shooting a 27" flight arrow (measured to the BELLY of the bow). Having overdrawn and stuck the point of an arrow into the belly a tip overlay sheared off. I repaired it, but didn't have the bottle to shoot it again.
So... I reworked it down to about 60# @26" ( I didn't want to draw it further on the tiller).
My PB had been 341 yards, and now the re-worked bow shoots 320yards (using the same arrows).
I've eased off the arrow pass and done a slight sideways correction at the arrow pass with heat (The bow was curved to the archers right away from the arrow pass).
High speed video at 1000 frames per second shows good arrow flight, and I thought adding an extended shelf to give 3" of over draw and therefore a shorter lighter more aerodynamic arrow might get it shooting further. Video shows the arrows rotating and tipping over at about 45 degrees after a few yards of flight, so there is a lot of tuning work to do. 
https://www.youtube.com/watch?v=YAIq9j6HsfE
Shooting with the shooting machine has it's own problems, clamping the bow too hard can cause misalignment of the string. The papier mache extended shelf shows some promise.


The other problem is arrow mass and spine, the best performing arrows seem to be about 280-300 grain, lighter was giving more speed but less distance in live trials on the field. I haven't got good speed figures using the overdraw shelf and chrono yet. Maybe the arrow isn't flying true through the chrono, I'm also not utilising the full overdraw as I'm short drawing with the machine, for fear of over stressing the wood.

Another question, is the lower limb a tad weak?

Monday, 3 February 2025

Hickory Warbow

The bow is from a 3x2" length of Hickory lumber. I was aiming for 120#, but due to my second rough out being a bit over enthusiastic I ended up with a weak point meaning it would only be 100#.

The belly is heavily heat treated, which helps it get to 100# (at 31") it performs smoothly and better than expected according to JT, who actually wants me to make him one at 120#.
One of the other chaps from the club, Innis, wants an 80# elb, and is happy for me to re-work the 100# as it is still fresh (only had 4 arrows shot from it), so all in all, that's a win-win situation.
The real point of this post is to make note of some dimensions as a reference:-


Overall length (nock to nock) 75.5"
Centre line width             34.6mm    thick 26.1mm
12" along (lower limb)    32.9                    19.3
24"                                   29.2                    18.9
36"                                   16.5                    13.4

Those figure probably don't meet the 5/8 thickness/width rule for an ELb, but once re-worked it will be fine.
To reduce it from 100# to 80# could theoretically be achieved by reducing the width to 80% but that would probably make the tips too narrow, however I can reduce the width a bit and then round the belly to make it more ELB and less AFB.
The build and test shot videos are all on my Youtube channel, here's the link to the test shooting:-
https://www.youtube.com/watch?v=zZrILwkx3sg

I've since re-worked it as an 80# elb mostly by reducing the width and slightly rounding the belly without removing th heat treating from the middle of the belly at all.

Tuesday, 19 November 2024

Hickory Kid's Longbow (aide memoire)

 I recently got some nice rough sawn Hickory from an old mate of mine (he'd bought up a load from someone who was shutting up shop many years ago), I hadn't done anything with it yet, then my mate JT asked if I had a light weight bow to suit an 11yr old lad (about 20-25# and 25"draw).
It seemed like a good opportunity to saw out a slat of Hickory and give it a try.
Unfortunately I didn't take any pics as I was in a rush to hand it over to JT who was going to finish sanding it and fit a leather grip.
I took it to the club and actually roved with it! I had to treat most marks as a par 2! But I was happy to be shooting something light as my left elbow has been giving me gyp (tennis elbow), I even tried it shooting one of JT's warbow arrows which flew surprisingly far!
Anyhow I got JT to take some measurements for future reference as I'm thinking of maybe trying a 35# Hickory flight bow.

Length 55" nock to nock, 25# @ 24" 
Bow width and thickness at; Nock: width: 10.5mm, depth 9.0mm Mid: width 20.3mm, depth11.2mm Ctr-width: 22.3mm, depth 17.3mm

Monday, 14 October 2024

Good Day at the Club

 I went to our Sunday rove, despite a stinking cold. I had a Yew stick bow to hand over, to replace a smashed 35# Yew primitive. I also collected the smashed one for a post mortem (I couldn't see any problem, other than it being in two pieces!). The stick bow, performed beautifully with arrows flying out with not even a hint of waggle.
I was given a couple of bottles of wine by another guy as a thank you for making him the "Robust Yew Primitive" with which he won his last 3D field shoot.
I wasn't up to shooting having had a flu jab and covid jab in my upper arms the day before, but I had a good natter with the guys, a tot of medicinal rum and I walked out to the first mark with them.
The weather was lovely and a breath of fresh air did me a power of good, knackered by the time I got home though!
Out of interest, I sawed a cross section of the failed bow, near where it broke. It shows rather nicely how deep the heat treating penetrates, how I'd maintained a fairly even thickness of sapwood, despite the heart/sap boundary not following a ring.


Tuesday, 8 October 2024

Arrow Speed Testing


 I finally got round to testing the reworked shoot through flight bow, (a Hickory Mollegabet, with heat treated Yew belly). It did 216 fps, but jarred my hand and elbow terribly. Investigation confirmed my theory that most hand shock is caused by an uncomfortable grip. Obviously the light flight arrow and high speed is a big factor too.
I've done some reshaping of the grip and ordered some 3mm neoprene foam sheet to pad out the grip, before re-testing. I think there is still a good 2 inches of draw to be had, so I'm optimistic about its performance.
Video of the speed testing here:-
https://www.youtube.com/watch?v=uICsUspyvO0
Video of the bow here:-
https://www.youtube.com/watch?v=tlnfIAbGhH0


Saturday, 24 August 2024

More Boo Yew Ipe

 Ah well, my calculations/estimates seem to be a bit too pessimistic, but better too strong than too weak! It's too stiff even after reducing the Ipe a little and rounding the belly. It was about 50# at 12" unbraced.
It was also trying to flip over sideways as it was rather thick compared to its width, also being unbraced and only pulling a few inches doesn't help.
I don't want to make the Ipe too thin, so I've carefully run it through the bandsaw down the middle of the thickest lamination and re-glues it. That takes about 1.5mm from the thickness.
Hopefully once it's finished I'll be able to work out some sort of fiddle factor for boo/Yew/Ipe.

Thursday, 22 August 2024

Boo Yew Ipe Flight ELB draw weight estimation

I'm trying to build a flight bow, but the belly lamination will be an Ipe slat which is 4.5 mm thick and this doesn't leave a lot of material for tillering. 
So I'm tillering it as Boo Yew stave and trying to estimate how the extra 4.5 mm of Ipe will increase the draw weight. Just for ease of calculation I'm assuming the Ipe will be the same as the Yew (it is stronger in compression, but I'm just trying to get an estimate.

Currently the bow is 40# @ 17.5" which correlates to 61.7 @ 27" draw (short draw flight bow).
Mid limb thickness is 16mm. 16 cubed is 4096 (stiffness being proportional to the cube of the thickness)

If I add 4.5mm to the thickness this gives 20.5 which when cubed is 8615.
8615/4096 = 2.1 so adding 4.5mm would give 2.1 times the draw weight! 129#
Hmm, looks like I need to take more off the belly before glue up.
Trying to calculate an appropriate draw weight and length without the Ipe to give the desired final result with the Ipe is beyond me, so it's down to the old successive approximation. Keep doing a bit and re-calculating.
BTW. Target draw weight is somewhere between 60 and 80#, so I have some margin to play with.

I've done some more work, but this is all rather guesswork. Adding 4.5 mm (I'm calling it 4 to allow for finishing) won't give the same effect at the tips as at mid limb. Say the tip is 12mm thick an extra 4mm is making it 33% thicker whereas near the grip where it is say 20mm thick it's only adding 20%. I s'pose taking the mid limb thickness isn't too bad.
I've currently got it drawing 19" at 35# with a 15mm thickness mid limb, which is giving a finished estimate of 101# . Still a bit high, if I can get the estimate down to below 90, I think I'll go for glue up.

Tuesday, 21 May 2024

Test Shot with Miniature Ballista


 It was a pig to bind the string onto the stubby arms of the ballista, and having tied one end on, that arm had to be held under tension by wedging it against the frame with a screw driver. I managed to get it done and it works! I'm using temporary skeins of braided nylon cord, as the cat gut was too powerful.
Getting it working has revealed several design flaws, and I firmly believe that is is an apprentice piece* to demonstrate the metal working skills of it's maker, rather than being an exercise in building a working miniature ballista.
* Possibly by a gunmaker or crossbow maker.
https://www.youtube.com/watch?v=Jqg6Qp7p2ok

Thursday, 16 May 2024

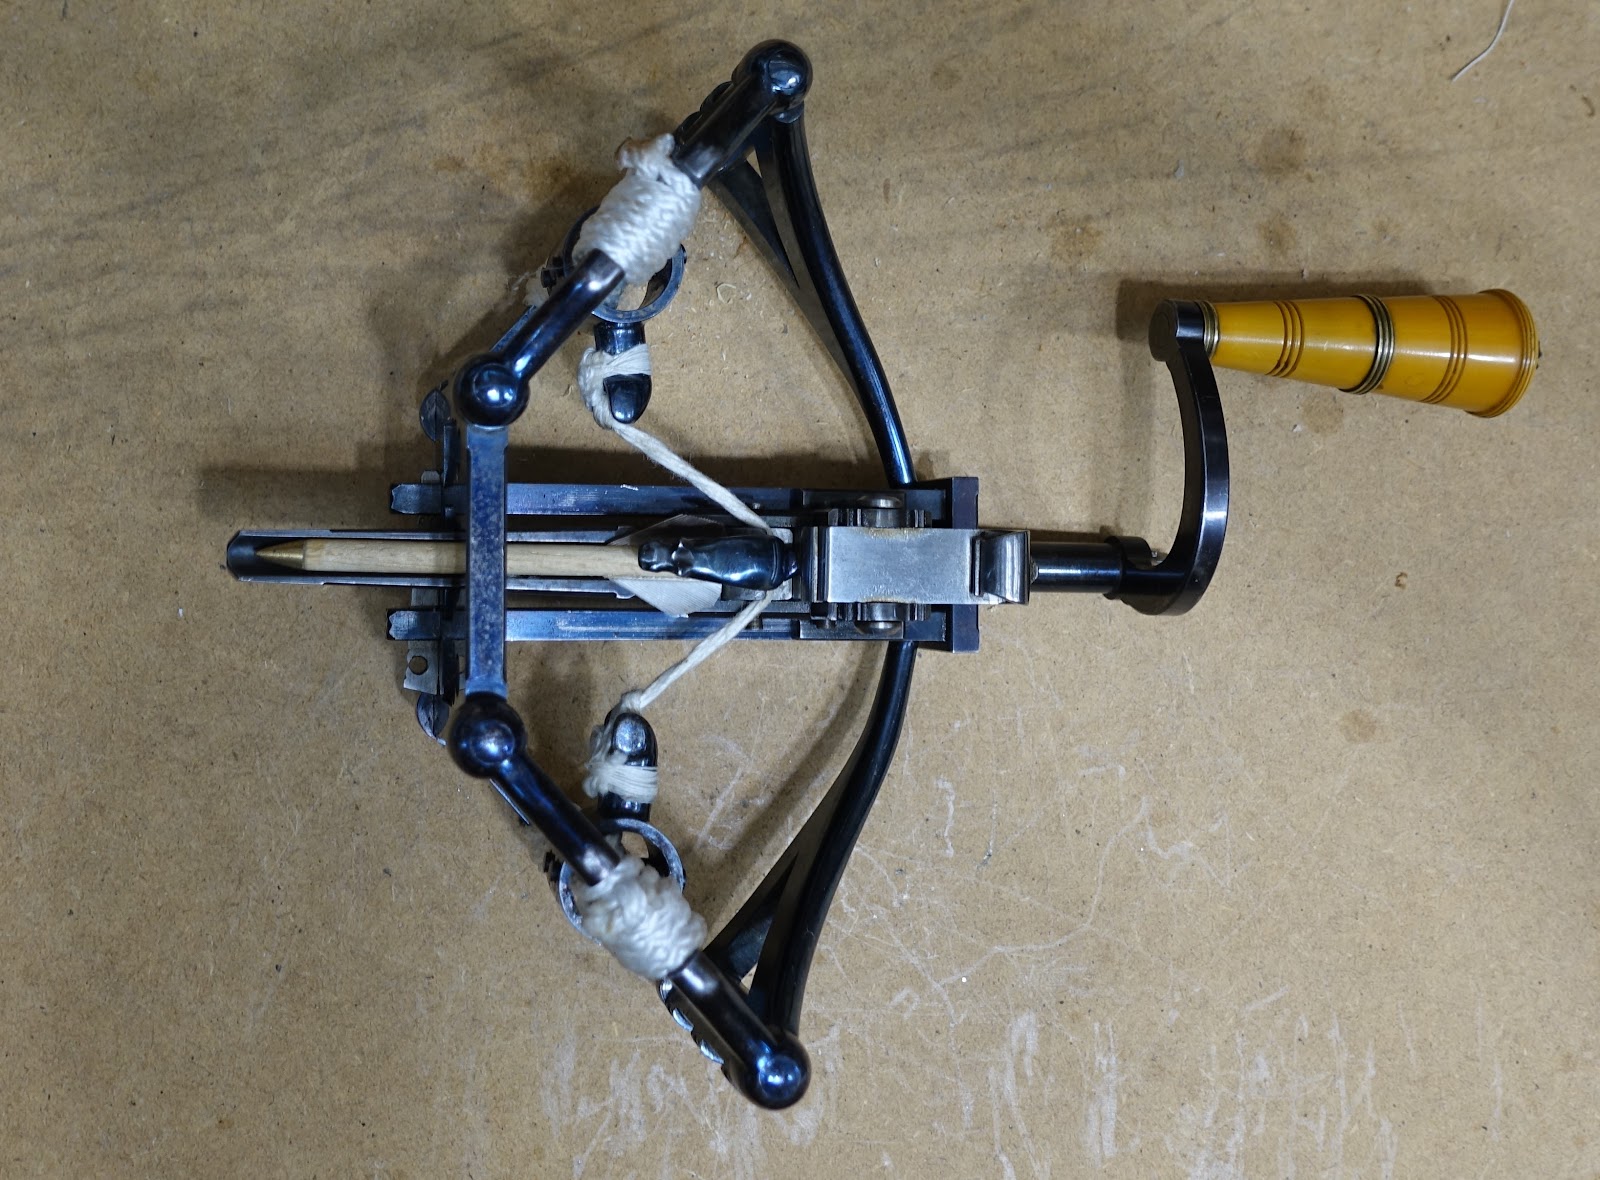
Miniature Ballista

 I bought this from a "Fine English Sporting Guns and Rifles" auction. The attached label doesn't give much info, and the string is broken. I'm hoping to figure out how it works and get it going. It should provide many hours of fun. The trigger mechanism has virtually no wear on it, so I'm assuming it was made for the fun of it or as a demonstration of the workers skill. Probably Victorian?
The arms that the string attaches to look rather short to me and there is no obvious way to pre tension the skeins of sinew. The 'wings' can fold back or forth and this may provide a way of stringing and pre tensioning.


Here's a transcript of the info that came with it written on 2 tiny labels.

Text broken int 4 sections corresponding to the 4 sides sides of the two labels. My comments in italics

Ballista/
Steel with folding “wings” :-
Origin and age not known, but animal-like sight looks oriental as does decoration:-
Fitted with 14th century European pattern revolving nut; but the groove in the stock is flat, not curved as in medieval bows to cut down friction; if the bolt was flighted it would have to be less than ¾” across to clear the columns in the central window (to be in scale the flights would be about 5/8”
----
across, with 3 flights) ; Winding handle may be in Ivory but more likely in Ivorine an early plastic;
Ones first impression is that it is French, the steel ‘stem of the handle’? is half-heart shaped, elegant and ‘resolved’? ; Fixing wedge is oddly short and undecorated; See ballistas on stands in Payne-Gallwey’s book “The Crossbow”; bought from Terry Sovine (French name?) (address given but not shown here).
----
David Martin wonders whether the bow has been put on back to front; there are two holes in the side of the frame towards the back which may be to fix the crossbow to a stand. (I disagree); when strung the string slopes downward from the centre; the screw thread on the screw holding the trigger spring is approximately
----
1BA and the thread on the animal-like sight is 2BA- both are a bit sloppy so I have locked them with Araldite; the barrel wobbles up and down a little; the sight centres ones aim but is no help for trajectory; there are file marks inside the outer wings and the centre ‘window’; catgut loose on right hand claw.


Friday, 5 April 2024

English Yew Primitive

 This is my first successful bow of the year, 50# @28"
(an earlier Wych Elm primitive exploded after about a dozen shots! I shall be doing a "repair" and destruction test later, just to see how well linen binding supports a break).
The Yew was local to me, it had been felled by the council following some storm damage, and just left to rot. 
The bow has some nice character is 66" from nock to nock, and the limbs are 2" wide at their widest.
Playlist for the entire build here:-
https://www.youtube.com/playlist?list=PLBz2tD9476KSe_bzPG5ZZRhW5_lEGsUWq


Saturday, 13 January 2024

Dear Diary a log and repairs

 Sometimes video isn't the best format for keeping track of stuff when there is a lot of it!
I've been pressing on with the Hickory flight bow rework despite multiple failures, as it seems to be providing opportunity for experimentation and learning for relatively little expenditure of time and effort.

Meanwhile one of the guys from our 'club' (a bunch of blokes who lob arrows around a field between sampling flavoured rum and eating cakes) brought me a 5' length of Yew log and a bow which I'd made him a few years ago, but was now too heavy. He wanted the 70# boo, Yew, Lemonwood taken down to 50#).

I then got contacted via facebook about a bow repair, it turned out to be a Ravenbeak bow (Boo,Yew,Yew) that I'd repaired before to patch a belly chrysal. It looks like the chrysal has returned and presumably the patch needs to be thicker and more extensive (Maybe there is a weak area in the core ?)


Mean while I've decided to cut the yew log into 4' billets as the thin end was a bit scruffy. The log is still very fresh and green and my 3tip alternate set bandsaw blade was worn out. I started to sharpen it, but soon gave up and ordered two new blades (from Just Bandsaw Blades).

So while I'm waiting for the bandsaw blades I need to have a good tidy up. Th bloke will be bringing the Ravenbeak repair over on Wednesday, so that will be an excuse to have a go with the Chinese repeater etc.
Sunday, 31 December 2023

Review of 2023

 Been a funny year, it feels like I've not done much in the way of making bows, but I've still been busy.
The year started with a 120# Yew warbow from a fairly challenging stave, I did a 100# one too. I also tried for another 120, but the Austrian Yew was full of shakes and it split in two! I managed to repair it and turn it into a respectable 60# roving bow.


The mkii H Bow flight bow (pic left) performed fairly well, with some nice additions like the counterbalance/stabiliser weight, before exploding!
My mate Rob had given me some Rowan last year and I made a primitive with that, always nice to use a new timber. It preformed like most 'white woods' and felt like a cross between Ash and Hazel.

The scoop back Yew primitive was something a bit different and a delight to shoot.
The big project of the year was the mkii Archer Automaton which was hard work, educational, frustrating and great fun in equal measure.
I'm currently reworking a shoot through Hickory Flight bow, which like all my stuff is now mostly on my youtube channel.(Del Cat@delcat8168)
This blog has reverted to its original purpose which is as an aide memoire for me, this post providing a useful summary of the year.
My last little project of the year was making some little box wood clamps (with M6 threaded rod for the screws) to assist the glue up of the Hickory flight bow levers. (2shown, but I made 3)


Of course it's also an opportunity to wish one and all a happy new year. May all your projects bear fruition, or at least provide some enjoyment and may all your arrows find their mark.

Del

Wednesday, 27 December 2023

Old Flight Bow Progress


Seasons greetings to one and all. I've been doing some post Christmas tinkering in the garage/workshop.
I've taken off about 4mm of chrysalled belly wood and glued on slats of heat treated Yew heart wood. I've used a slat of Yew (~5mm thick) to construct the levers, making them a T section.

It's been up on the tiller for a quick shufti and I can see the levers are flexing.(mostly at the inner end) They are bound to flex a bit but I was expecting them to be stiffer. I can experiment by gluing on an additional strip to make them I section, which should help.
I used hide glue which can be released with gentle heat, so if necessary I can rebuild the levers a tad thicker and deeper maybe even V section.


Wednesday, 6 December 2023

Reworking a Flight Bow

 I've got an old Hickory shoot-through flight bow with a chrysalled belly. It was a bit lethal, as I was trying to shoot it, finger loosing it, this set the arrows flexing and they tended to smash. Since then I've made a release aid, and that is probably the key to getting the shoot-through to work.
I'm going to rasp/machine off the belly (the chrysals go about 4mm deep) and add a new belly of heat treated Yew heart wood.
I'm aiming for 50# at 24" draw with a very light arrow.
Most of my stuff is on my Youtube channel now, but this post is really a log of what I'm aiming for with this bow.The bow is a Mollegabet style and I think the levers are a bit long and heavy, so they may get reduced during test/development.One dilemma is how do I terminate the new belly at each end where the thickness of the original bow increases at the grip and the levers? I'm favouring a simple butt joint, which, being in compression should hold. I'm concerned that if I try and fade it out at each end it may lift or splinter.


Tuesday, 17 October 2023

Mkii Archer Automaton


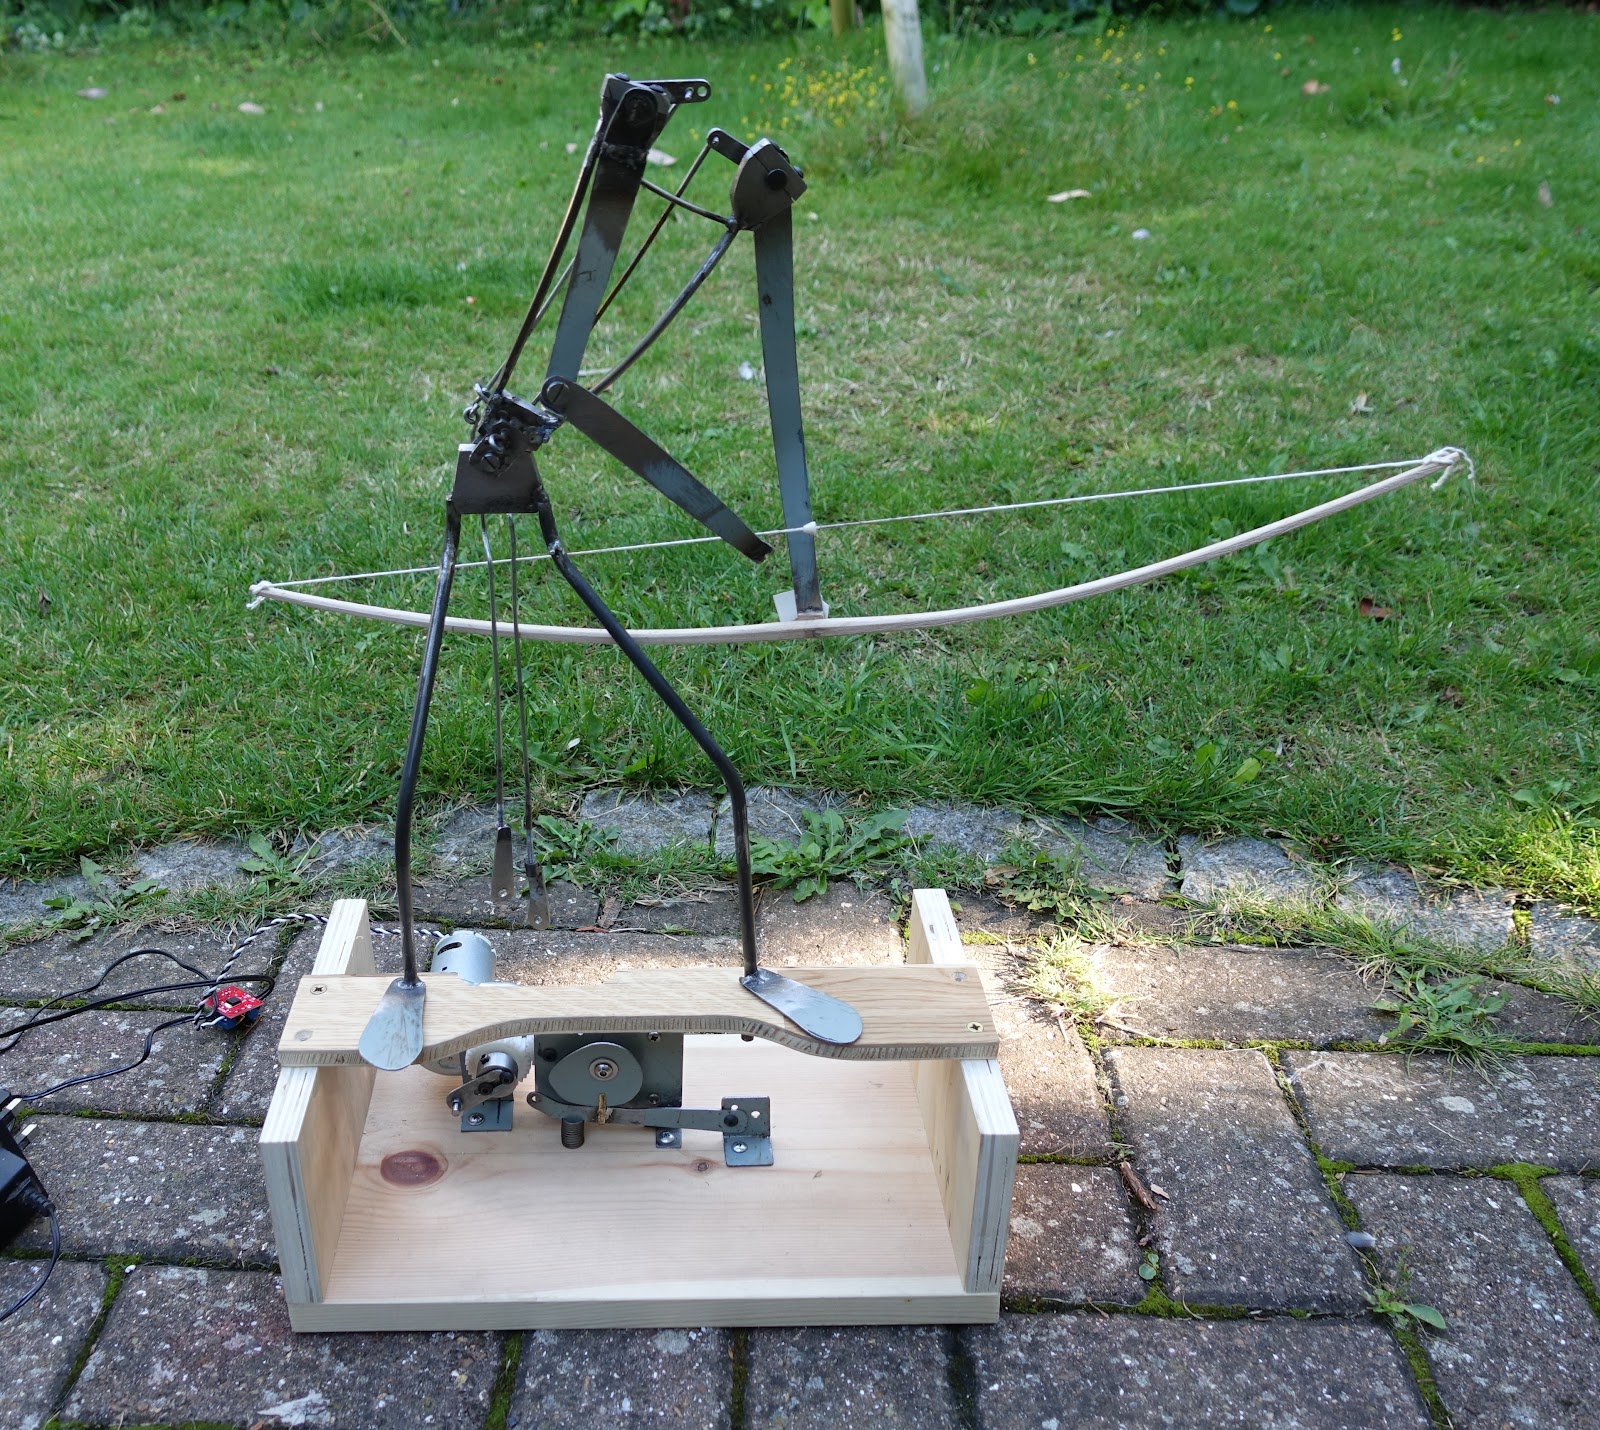
I've got it working pretty reliably now. Still lots of cosmetic stuff to do.
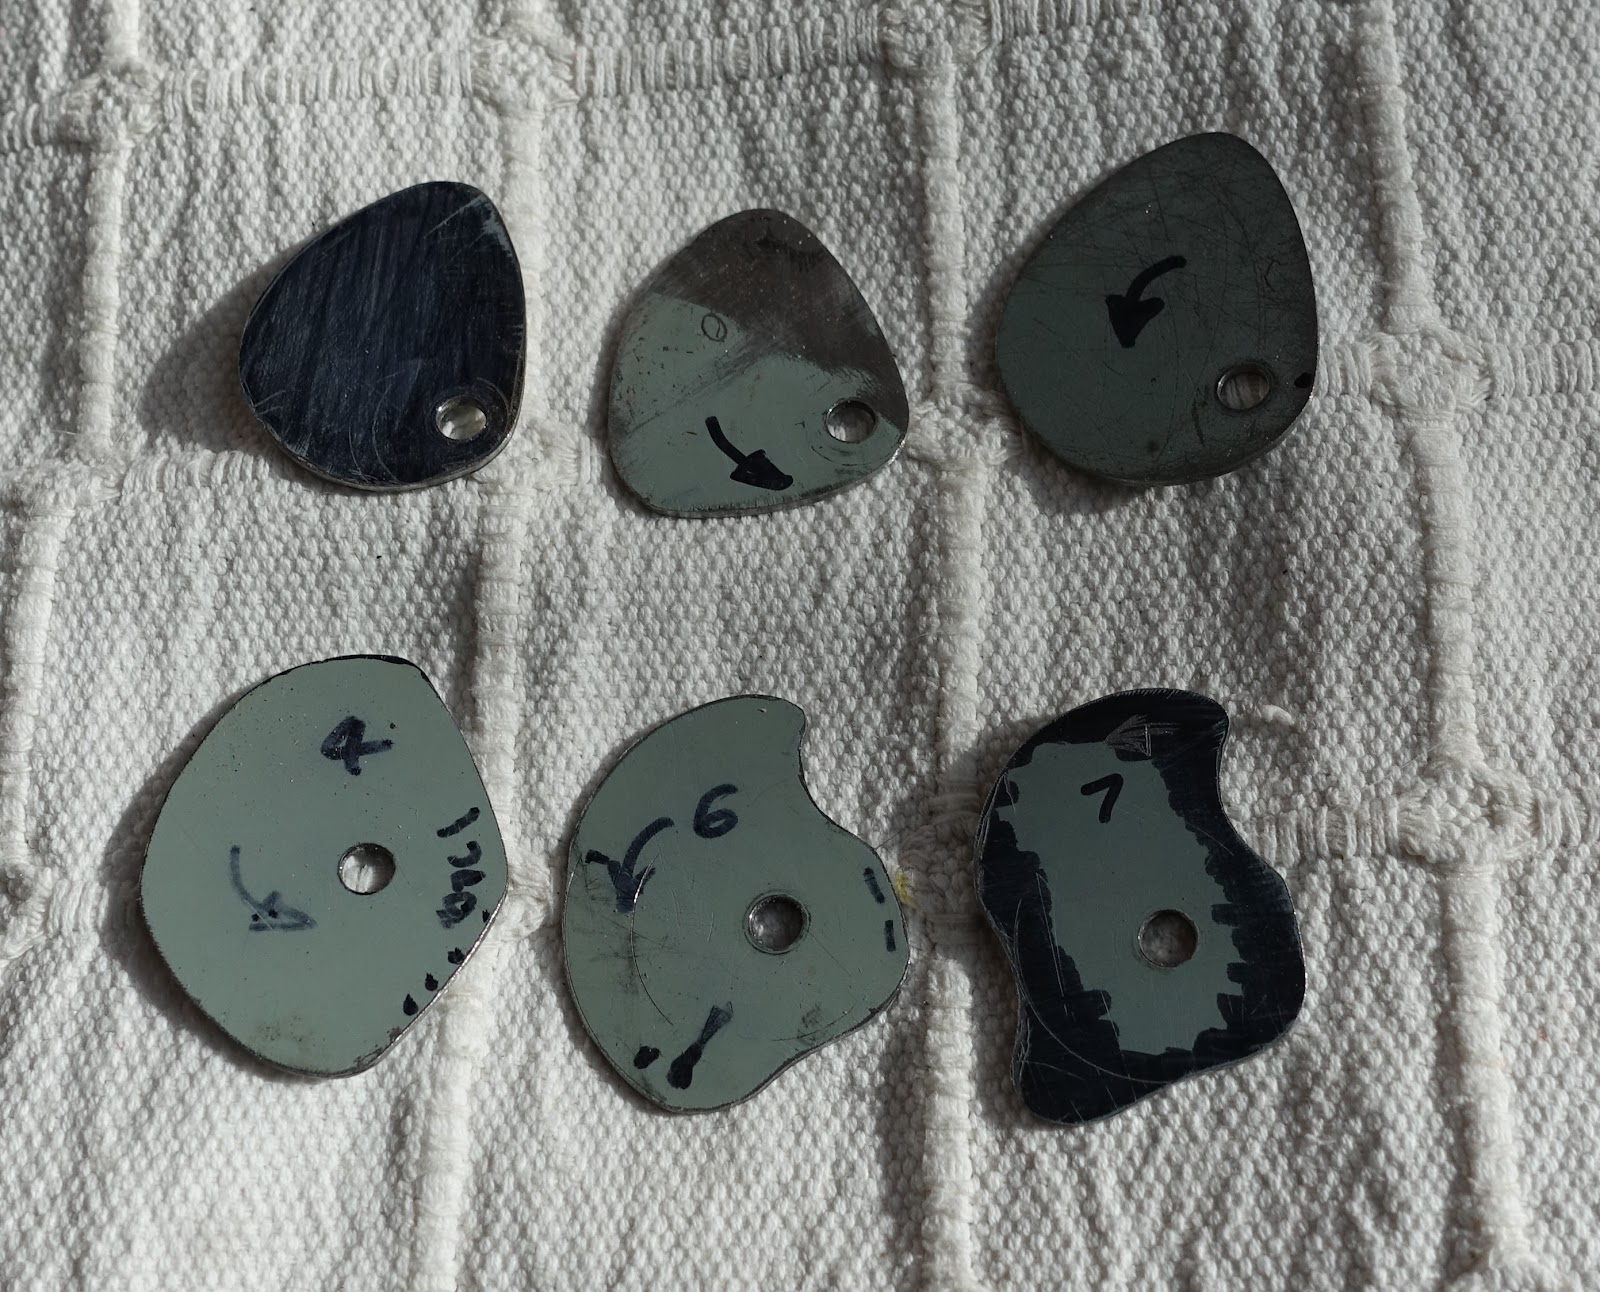
The basic movement is done by 2 control rods, one on a crank and the other (bow arm) on a cam. I've gone through about 9 iterations of the cam, and I've just made a new one, to try and get the two arms coming up together. It works very well and is a big improvement.


In the video you can see the bow arm comes up a bit too early ( or a medieval style draw).
There has been an immense amount of fiddling and fettling, but it all slowly improves the reliability and repeatability.
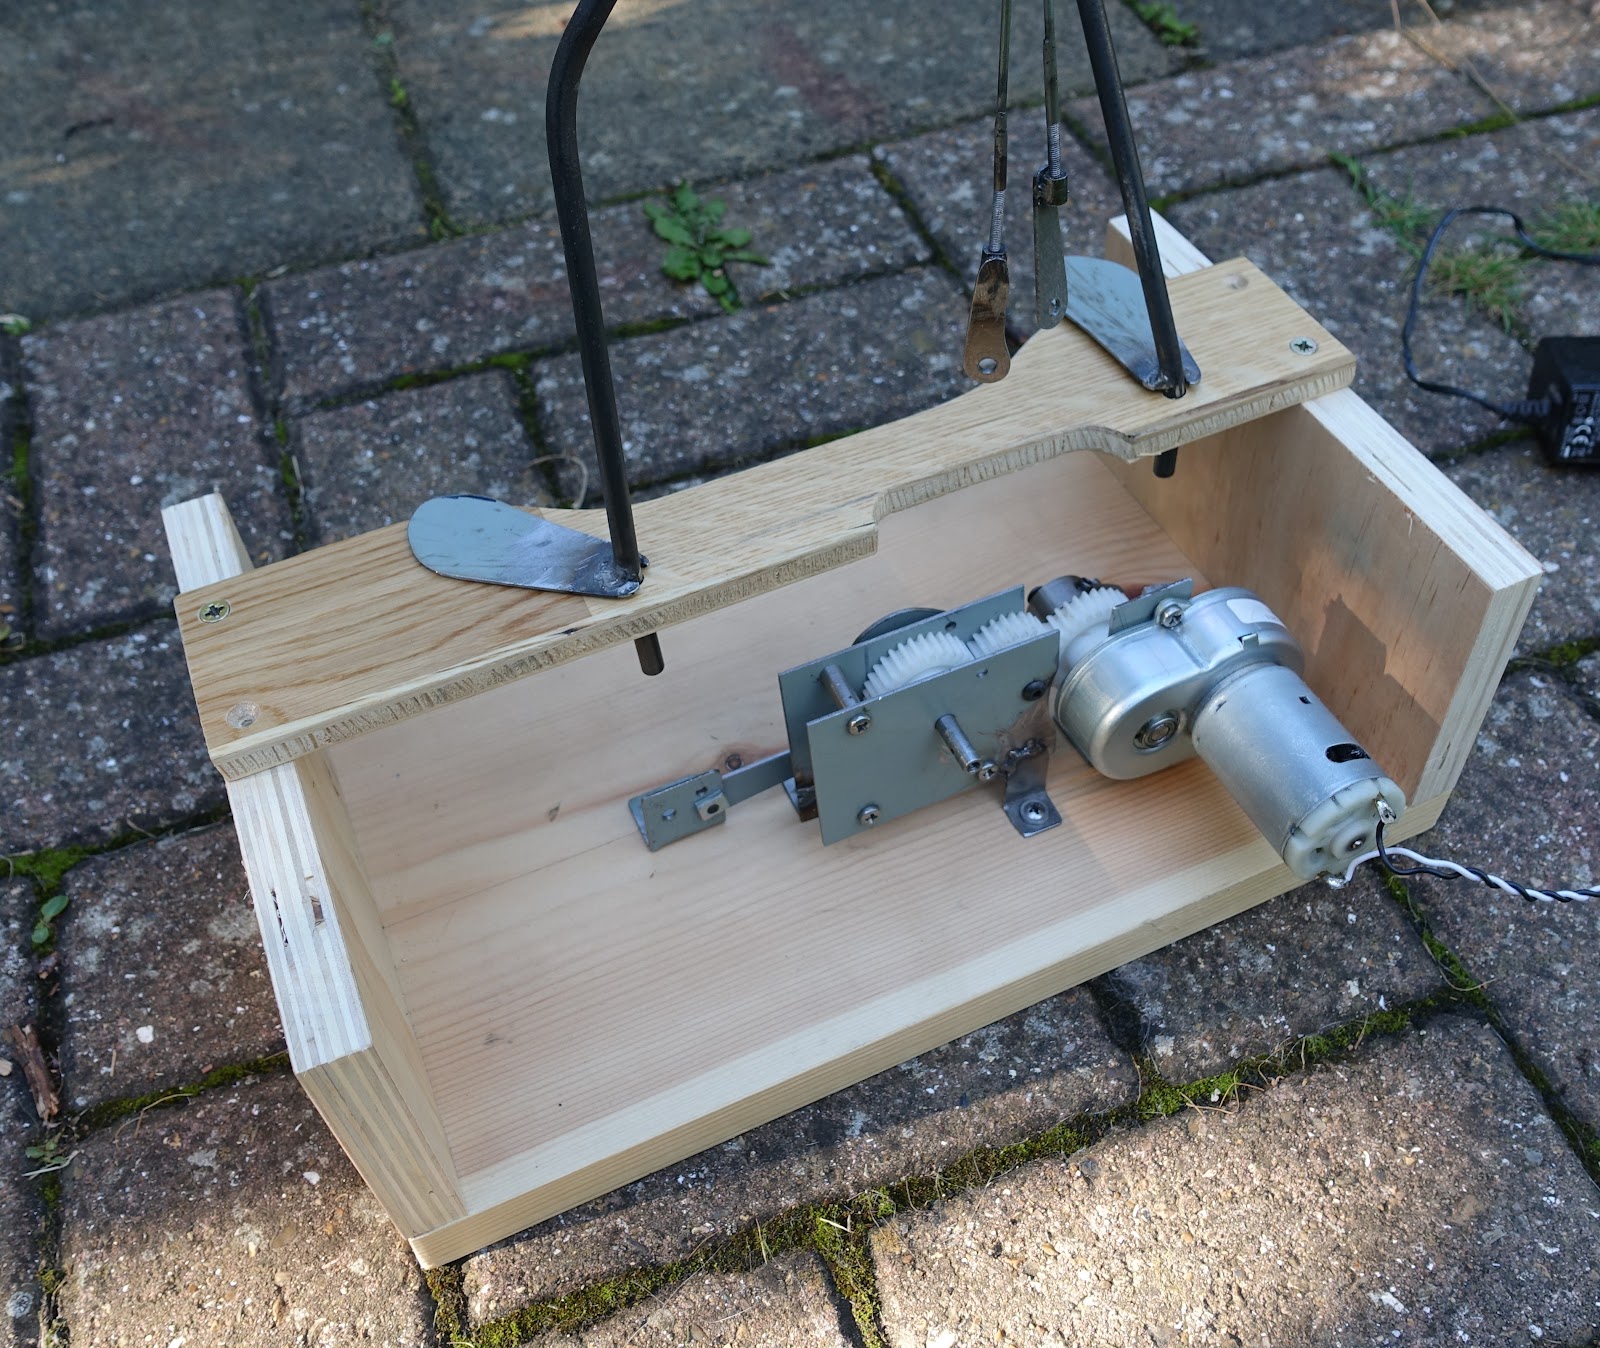
It's motorised now so that pressing a button starts it, and then it stops after the arrow is loosed, as the microswitch is actuated (see bottom pic)


https://www.youtube.com/watch?v=eDJvVBdDx54

Thursday, 10 August 2023

Work on the mkii Archer Automaton

 This has been a long term ongoing project that entails endless thought, lots of trial and error and a huge amount of patience.
I makes me realize that a bit like making a bow, it's not all about the end result. The pleasure is in the art and craft, the problem solving and actually doing something with ones hands. Enjoying the process makes the required patience a joy rather than a chore.


Almost every part of the automaton has been made multiple times, and there are unexpected interactions between the moving parts. The linkages, pivot points, and movements all interact, and the timing between the various motions need to be precise.
I've built it up slowly, getting one aspect to work and then progressing to the next. Of course once the next action works nicely, the first one may no longer function! But by then the understanding of the motion has been enhanced.
Originally the motor/gearbox mas mounted between the feet, but I've built a plinth such that the motor/gearbox will now be below 'ground level'.
The biggest challenge has been to get him to collect the arrow on the string. The next big challenge is the loosing mechanism.


Over the development I've had to try 3 different motor/gearboxes, unfortunately the best one stripped an internal tooth. I found some great ones on E-bay, with the requisite very low gearing and hopefully enough output torque to draw the bow. (I'm waiting for it to be delivered).
Originally the 2 main movements were on cranks, one of these has been changed to a cam as it can be adjusted to give an asymmetric motion. I'll probably retain the right arm motion as a simple crank otherwise I'll end up with too many variables to adjust.